This information is for educational purposes. Keyboard work involves small parts, soldering irons, and electronics — work in a ventilated space when soldering, unplug boards before opening them, and modding a board may void its warranty. When in doubt, check the manufacturer's documentation first.
To build your first custom keyboard, start with a hotswap barebones kit in the $60-110 range, add a 90-pack of switches and a PBT keycap set, and you have a working board in about 30 minutes with zero soldering. That single decision — hotswap over solder — is what turns a scary project into an afternoon.
I have built through every tier of this hobby, from a $40 stock 60% I keep on the shelf as the “before” in every comparison, up to an aluminum 65% I soldered myself at a bench that also wires my sim button boxes. The first board is the one people overthink the most and regret the least once it’s done. This guide is the path I’d hand my past self: what to buy, what to skip, and where the hobby quietly tries to spend your money for you.
One more thing before the parts list: I’m not going to sell you the dream that your first board will be perfect. It won’t be, and that’s the point. The first board’s entire job is to convert vague YouTube envy into specific, felt preferences — “I want it heavier,” “this is too clacky,” “I miss my arrow keys.” You can’t shop for those opinions; you have to build something and live with it. Everything below is aimed at getting you to that working board for the least money and the least risk, so you can start forming real opinions instead of borrowing other people’s.
What Does a Custom Keyboard Actually Mean?
A custom keyboard is one you assemble from separate parts — a board (case + plate + PCB), switches, and keycaps — instead of buying a sealed unit. The defining freedom is that you choose the switches and caps yourself, and on a hotswap board you can change them later without a soldering iron. That is the entire appeal in one sentence.
The word “custom” scares people into picturing CNC cases and group buys with two-year waits. It does not have to mean any of that. My daily driver for years was a Keychron V/Q-class hotswap board that costs less than a sealed gaming keyboard, and it is fully custom in the only way that matters: I picked the switches, lubed a set, and swapped the caps. Everything past that — the aluminum cases, the gasket mounts, the artisan economy — is optional depth you can add when you actually want it, not a prerequisite for entry.
Hotswap vs Solder: Which Should a Beginner Pick?
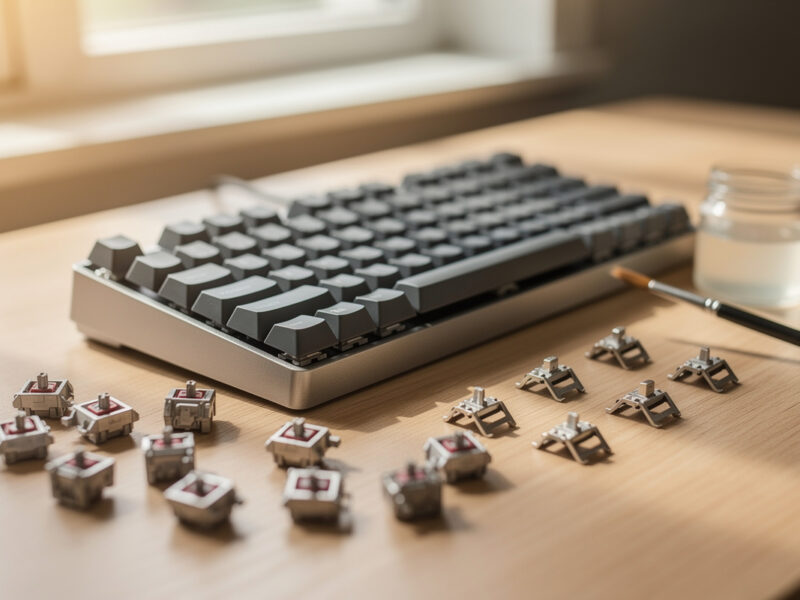
Pick hotswap, full stop. A hotswap PCB has sockets that grip each switch’s pins, so switches push in and pull out by hand. There is no iron, no flux, no risk of a cold joint killing a key on your first build. For a first board this removes the single largest failure mode.
I learned the trade-off honestly by going the other way later: I desoldered a 60% to migrate it, and even with a temperature-controlled iron and a desoldering pump, that is a two-hour job where one slip lifts a pad. Solder builds do buy you a wider catalog of boards and slightly cleaner switch seating, but none of that belongs in a first build. Start hotswap. If the hobby sticks, you can graduate to a solder board with your eyes open — I cover the full migration path in the hotswap-vs-solder breakdown, and it reads very differently once you have one build behind you.
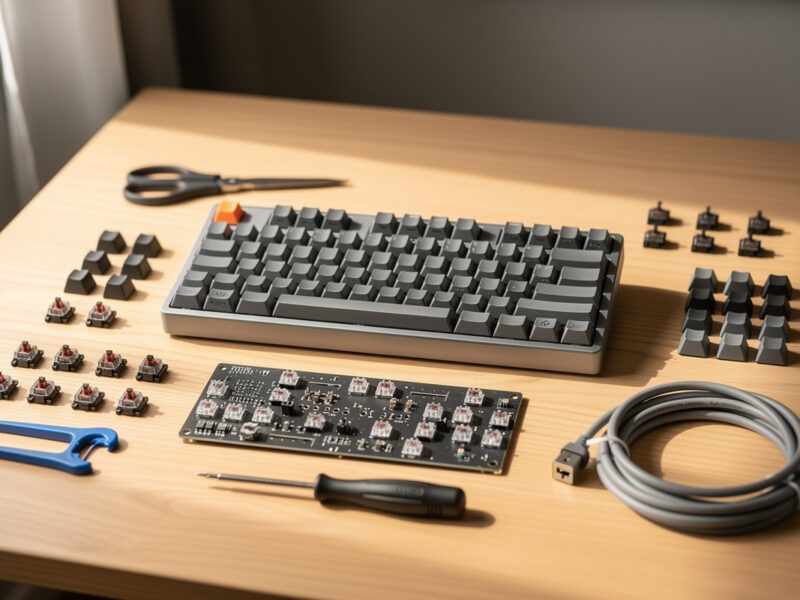
The Three Parts You Buy (and Nothing Else)
A first build needs exactly three things: a barebones hotswap board, a set of switches, and a keycap set. If you want my actual board shortlist, I rounded up the best hotswap keyboards under $100 separately. Budget roughly $70-110 for the board, $25-45 for a 90-pack of switches, and $25-50 for caps. That is a complete keyboard for around $130-200 — less than many sealed boards, and yours to change forever.
Everything beyond those three is a want, not a need. Lube, films, a switch opener, foam mods — they all improve the board, but they are second-build territory. The mistake I see most is a beginner buying a $40 lube station and a $200 board before they have ever pressed an unlubed switch and decided whether they even care. Buy the three parts, type on it for a week, then decide what is bothering you. The board tells you what to upgrade.
A note on layout: 60, 65, 75, or TKL?
For a first board I steer people to 65% or 75%. A 65% keeps arrow keys (a 60% drops them, which trips up new builders), and a 75% adds a function row in a compact frame. Both are forgiving daily layouts. I own all of them and the 65-vs-75 decision is genuinely close — I break it down in its own 65% vs 75% guide because it is the one layout question worth getting right up front.
The reason I push people away from a 60% as a first board is purely practical: it looks clean in photos, but the day you need an arrow key or an F-key you’re reaching for a function-layer combo you haven’t memorized yet, and that friction sours the whole experience while you’re still learning. A TKL (tenkeyless) swings the other way — it’s a full layout minus the numpad, which is comfortable and familiar but takes more desk and rarely comes as an interesting first hotswap kit. The 65-to-75 window is the sweet spot where compact meets “I never have to think about where a key went.” Start there and you can explore the extremes later from a position of knowing what you’re giving up.
How Much Should a First Custom Keyboard Cost?
A complete, genuinely good first build runs $130-200: about $70-110 for a hotswap barebones board, $25-45 for switches, and $25-50 for keycaps. You can go cheaper with a $50 board, but the floor where parts stop fighting you sits around $130 total.
The number that matters more than the total is where the money does the most work. On my bench, a $40 switch-and-stabilizer tune on a cheap board beats a $200 board swap for typing feel almost every time — which is exactly why I tell first builders not to chase an expensive case. Spend on the switches you’ll feel under your fingers eight hours a day, keep the board sane, and leave room in the budget to learn what you actually like before you commit to an “endgame” that the hobby invented to keep you buying. If you want the line-item version, I priced a full $130 budget build parts list down to the exact cart.
Barebones Kit vs Prebuilt: What’s the Difference?
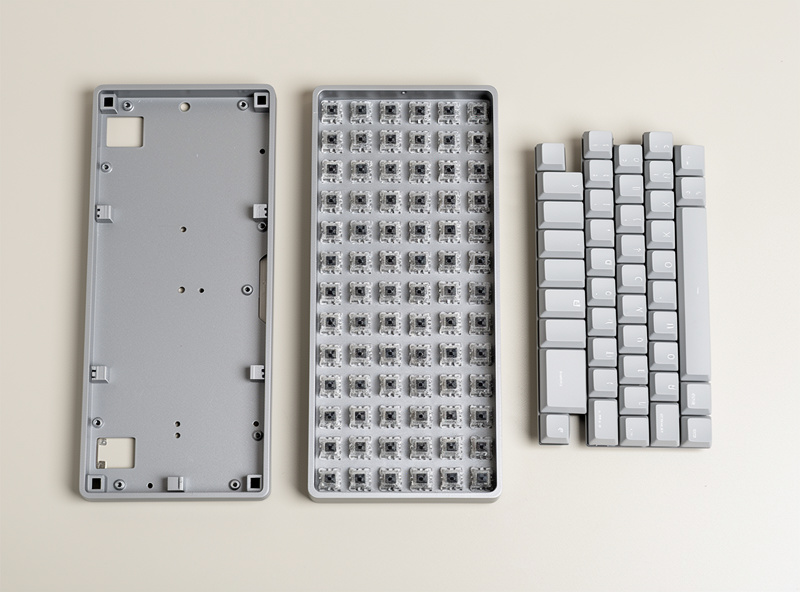
A barebones kit ships the case, plate, and PCB assembled but with no switches or caps — you add those. A prebuilt arrives fully assembled and typing-ready. For learning, barebones wins: installing switches and caps is the part that teaches you the board, and it takes about 30 minutes.
Prebuilts are not a trap — a good hotswap prebuilt with decent stock switches is a fine starting point if you genuinely don’t want to assemble anything. But you pay for the assembly and you inherit whatever switches the maker chose, which are rarely the ones you’d pick. I think the barebones route is the better teacher and the better value, and the gap is small enough that the deciding factor is honestly how much you want to do it yourself. The full barebones-vs-prebuilt breakdown lays out both routes with the trade-offs side by side.
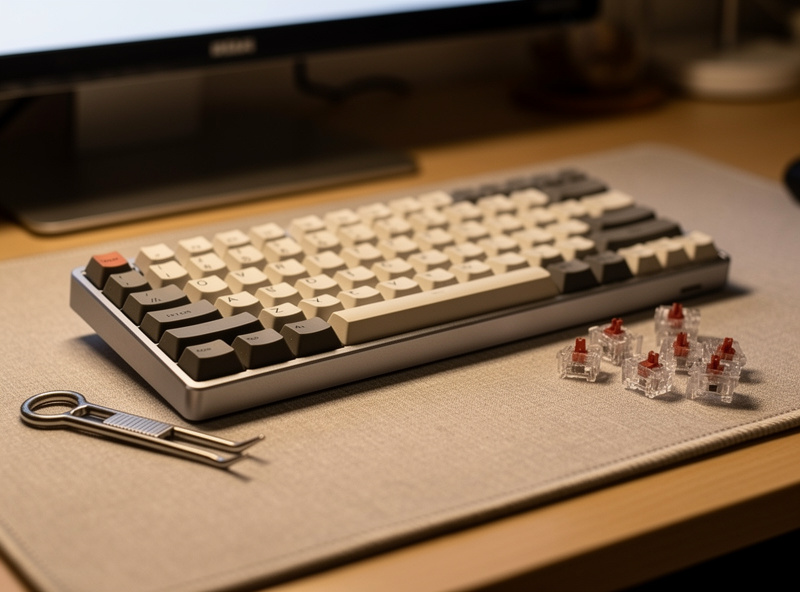
The Switches Are the Decision That Matters
Switches define how the board feels and sounds more than any other part, and on a hotswap board they are the one thing you can change endlessly. There are three families: linear (smooth all the way down), tactile (a bump at actuation), and clicky (a bump plus an audible click). Most first builders land on linears or light tactiles.
Buy a 90-pack of one switch you think you’ll like, and if you’re unsure, grab a switch tester first — it is the cheapest insurance in the hobby. My switch drawer outgrew its drawer because I judge switches by ear on a controlled sound rig rather than trusting phone-mic recordings, and the honest truth is that what reads as “thocky” on YouTube is mostly the board and the recording, not the switch. Pick a switch, live with it, and remember that hotswap means this choice is never final. The deeper “why customs feel different” piece is the one to read once you’ve felt the difference yourself.
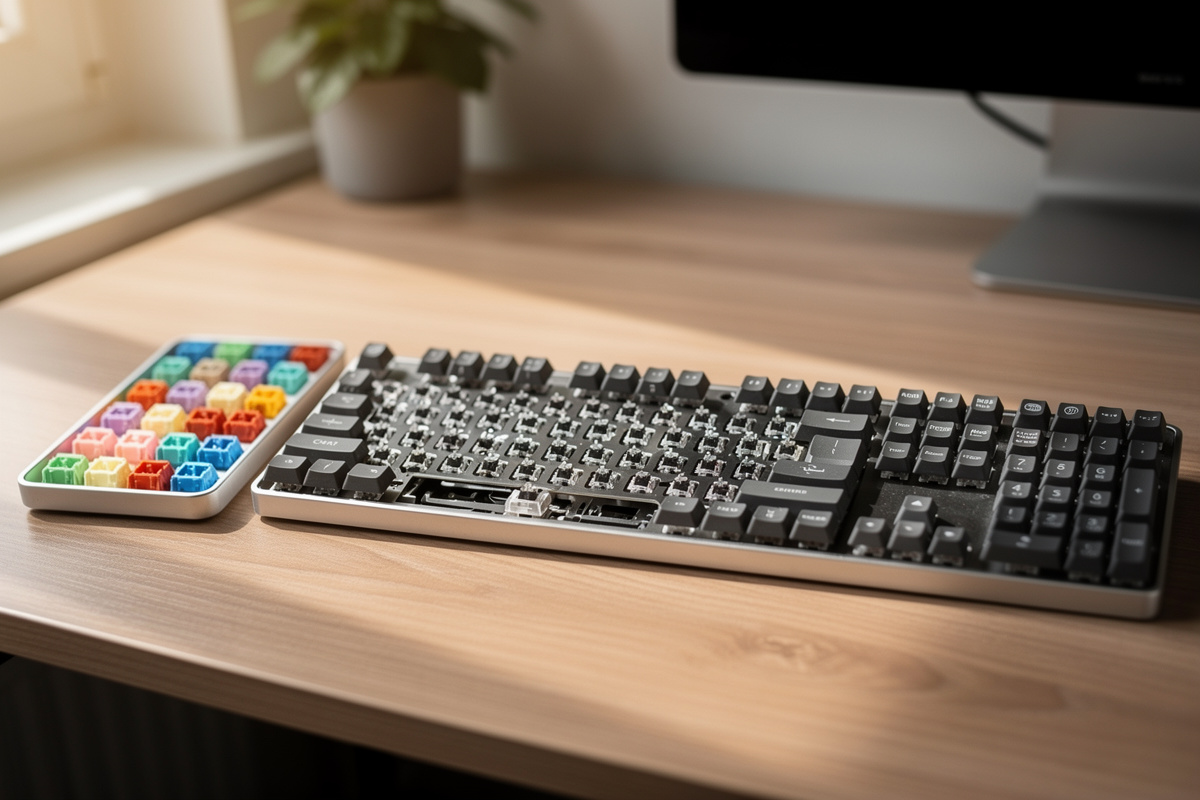
Keycaps: PBT vs ABS and Why It Matters Day One
For a first set, buy PBT in Cherry profile. PBT is a denser plastic that resists the greasy shine ABS develops within weeks of heavy use, and Cherry profile is the low, sculpted shape most people find comfortable without retraining their fingers. A decent PBT set runs $25-50 and outlasts the cheap ABS caps that ship on most stock boards.
I run PBT Cherry-profile caps as my dailies and keep an ABS GMK-class set around precisely so I can show people the honesty piece: ABS feels slightly smoother and softer at first, but after a few weeks of typing the high-traffic keys go glossy and slick, while my PBT sets from years ago still have their texture. That shine is not a defect — it’s just ABS being ABS — but a first builder should know it’s coming before they pay GMK money. Profiles like SA and XDA are fun experiments for later; for board number one, the low-fuss choice that keeps its grip is PBT Cherry, and you’ll spend zero time second-guessing it.
What Tools Do You Actually Need?
A hotswap first build needs almost nothing: a switch puller and a keycap puller, both of which usually ship bundled with the board. That’s the entire required toolkit. If you later move into switch tuning you’ll want a switch opener, stem holders, brushes and lube — but none of that is required to get a board typing.
I keep a full tuning bench because I process switches by the hundred, but I’m careful to tell first builders that buying that bench up front is the classic order-of-operations mistake. The puller that came in the box does everything your first build asks of it. When you eventually decide a switch sounds scratchy or a stabilizer rattles, that’s the moment to add tools — and by then you’ll know exactly which ones, because the board will have told you. The same temperature-controlled iron that wires my sim button boxes only comes out for solder boards and repairs, never for a first hotswap build.
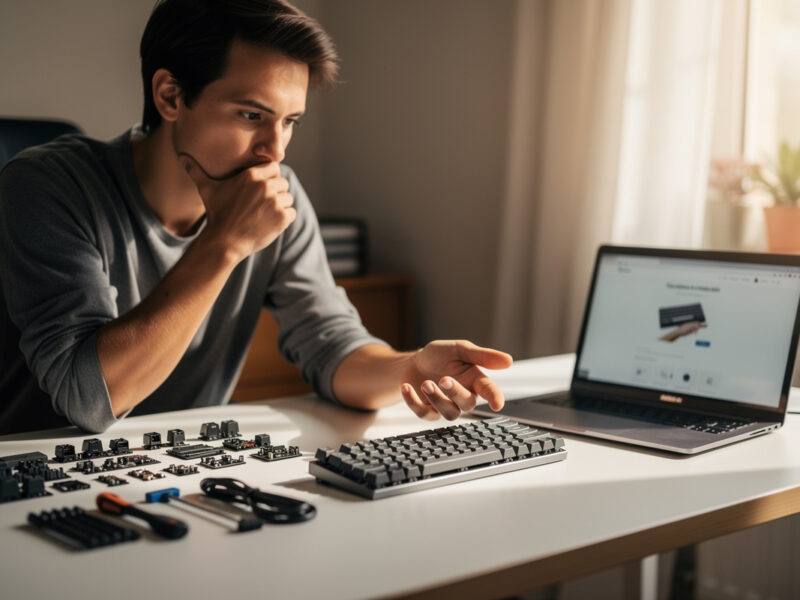
Where to Buy Without Getting Burned
Stick to in-stock vendors and major marketplaces for a first board. The appeal of buying in-stock is simple: the board exists, ships now, and can be returned if something’s wrong — none of which is true of a group buy. For switches and caps, a 90-pack and a single PBT set from a reputable seller covers everything.
The thing to avoid as a beginner is letting interest-check threads and group-buy hype set your shopping list before you’ve ever assembled a board. Those are real parts of the hobby, but they reward patience and specific taste, and you have neither yet — that’s not an insult, it’s just the starting line. Buy what’s on the shelf, build it, and form opinions with your own fingers. Vendor histories and proxy services and the whole market-navigation layer matter once you’re chasing a specific board; for entry, in-stock is the safe and correct default.
First Custom Keyboard Parts: A Comparison
This is the at-a-glance version of every decision above. The “beginner pick” column is what I’d put in a first-timer’s cart without hesitation; the “why” column is the reasoning I’d give standing over the bench.
| Part | Beginner pick | Typical price | Why this choice |
|---|---|---|---|
| PCB type | Hotswap | Included in board | No soldering; switches change by hand |
| Board format | 65% or 75% barebones | $70-110 | Keeps arrows; compact; teaches assembly |
| Switches | Linear or light tactile, 90-pack | $25-45 | The part you feel; hotswap means reversible |
| Keycaps | PBT, Cherry profile | $25-50 | Durable, neutral feel, doesn’t shine fast |
| Stabilizers | Whatever ships stock (tune later) | Usually included | Tuning is a second-build skill, not entry |
| Tools | Switch + keycap puller (often bundled) | $0-10 | All a hotswap build needs day one |
The 30-Minute First Build, Step by Step
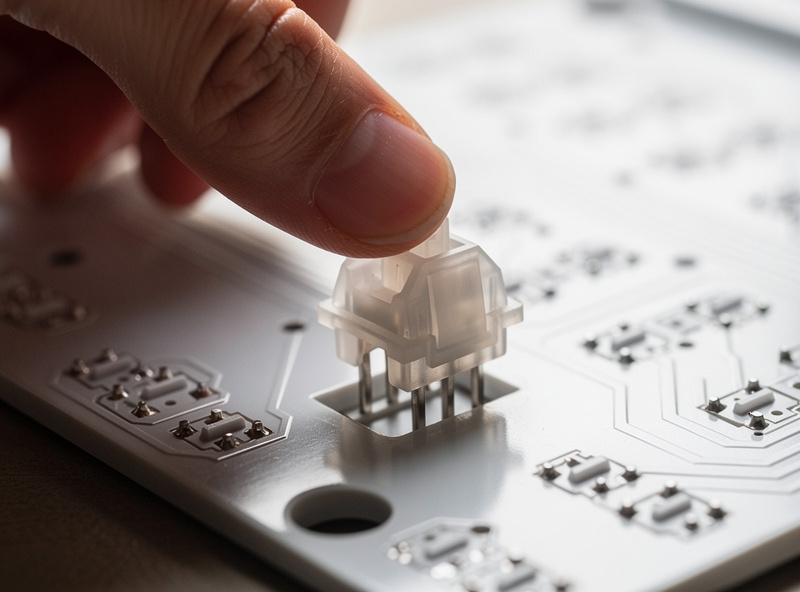
A hotswap first build takes about 30 minutes with no tools beyond a switch puller. Seat the switches, clip on the keycaps, plug it in. The whole process is genuinely hard to get wrong, which is the entire reason I push beginners toward hotswap.
Work like this: unbox the barebones board and check that pins are straight on a few switches before you commit. Press each switch straight down into its socket until it clicks flush — a bent pin folds under instead of seating, so look before you push. Once a full row is in, test it in any key-tester website before capping, because pulling a cap to fix a dead switch is more annoying than catching it now. Then clip caps on, plug in, and remap anything you want in VIA. That’s a working custom keyboard. Everything after this — lubing, stabilizer tuning, foam mods — is optional refinement you do because you want to, not because the board needs it.
Mistakes I Made So You Don’t Have To
My first real mistake was buying gear in the wrong order — a lube station and films before I’d typed on a single stock switch, which meant I was tuning toward a feel I hadn’t even formed an opinion on yet. The fix is boring: buy the board, type for a week, then upgrade what actually bothers you.
The second was chasing “endgame,” the hobby’s running joke that there’s a final perfect board. There isn’t, and believing there is just makes you spend toward a moving target. My third, more embarrassing one: I trusted a sound test from a phone mic and bought switches that sounded nothing like that on my desk — which is why everything on this site is recorded the same controlled way every time. Your first board’s job is to teach you your own preferences. Let it do that before you spend a cent on the deep end.
Should You Wait for a Group Buy?
No — not for your first board. A group buy is a pre-order where you pay months ahead for a board that ships later, sometimes much later. For a first build that means waiting on something you can’t return to learn things an in-stock $90 board would teach you today.
Group buys have their place once you know exactly what you want and a specific board only exists that way. But treating a group buy as your entry point is backwards: you’re committing real money and real patience to a guess. Buy in-stock now, learn what you like, and if a group buy still calls to you in six months, you’ll make a far better-informed bet. I lay out the wait-or-buy group buy math in full for anyone tempted by the hype.
Frequently Asked Questions
Is building a custom keyboard hard for beginners?
No. A hotswap first build takes about 30 minutes with no soldering and no special tools beyond a switch puller. You seat switches by hand, clip on keycaps, and plug it in. It is genuinely hard to get wrong.
How much does a first custom keyboard cost?
A complete first build runs $130-200: roughly $70-110 for a hotswap barebones board, $25-45 for a 90-pack of switches, and $25-50 for a PBT keycap set. You can go cheaper, but parts stop fighting you around $130 total.
Should my first keyboard be hotswap or solder?
Hotswap. The sockets let switches push in and pull out by hand, removing the biggest first-build failure mode. Solder builds widen your board options but belong in a second build once you have one assembly behind you.
What size keyboard is best for a first custom build?
A 65% or 75%. A 65% keeps arrow keys that a 60% drops, and a 75% adds a function row in a compact frame. Both are forgiving daily layouts that don’t force you to relearn your typing.
Do I need to lube switches on my first build?
No. Lubing improves feel and sound but is a second-build skill. Build with stock switches first, type for a week, and decide whether the sound or smoothness actually bothers you before you buy a lube station.
Is a barebones kit better than a prebuilt for a first board?
For learning, yes. A barebones kit makes you install switches and caps, which teaches you the board in about 30 minutes. A prebuilt is fine if you want zero assembly, but you pay for it and inherit the maker’s switch choice.
Related Guides
- Best Hotswap Keyboard Under $100 for a First Build
- Barebones vs Prebuilt Keyboard: Which Should You Buy?
- 65% vs 75% Keyboard: Which Should Be Your First Board?
- Budget Custom Keyboard Build: The Exact $130 Parts List
- Should You Wait for a Group Buy for Your First Keyboard?
- Why Do Custom Keyboards Feel Better? An Honest Answer