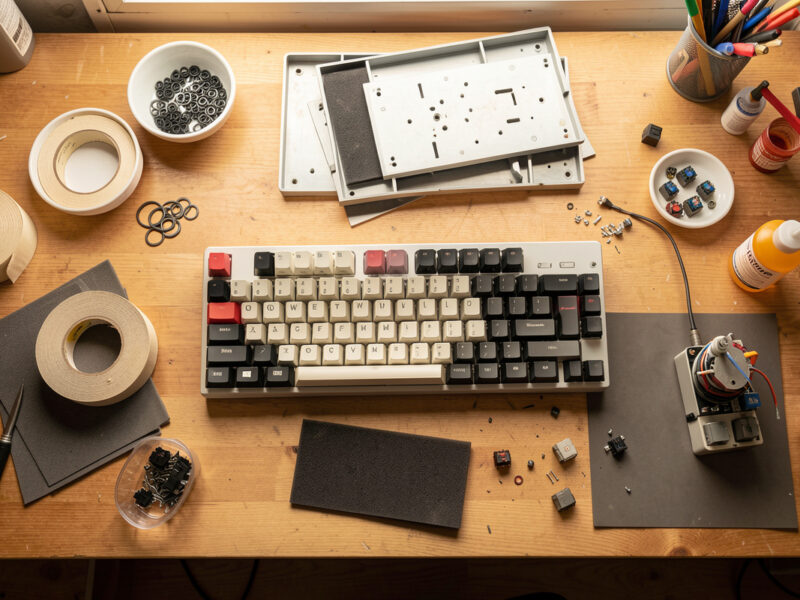
This information is for educational purposes. Keyboard work involves small parts, soldering irons, and electronics — work in a ventilated space when soldering, unplug boards before opening them, and modding a board may void its warranty. When in doubt, check the manufacturer's documentation first.
The tape mod is the best dollar you can spend on a keyboard. Two or three strips of painters tape across the back of the PCB reflect sound back into the case instead of letting it die, and the result is a slightly deeper, more solid signature. It costs about two dollars, takes five minutes, and on a hollow budget board the difference is genuinely audible — recorded on the same mic, same distance, same desk, every time.
That said, it is a refinement, not a transformation, and where you read “completely changed my board” you are usually reading a louder edit. Here is exactly what the tape mod does, where it helps, where it does nothing, and how I actually do it on my own boards.
What the tape mod actually does
The tape mod is strips of tape applied to the underside of the PCB, under the switch area. Sound from a keystroke travels down into the case; on a hollow board a lot of that energy bounces around the empty cavity and comes back as a thin, slightly hollow ring. The tape adds a reflective layer that changes how those frequencies behave, generally deepening the sound and making it feel a touch more solid and “full.”
It is one of the cheapest mods in the hobby and one of the easiest to reverse — peel it off and you are back to stock in thirty seconds. On my stock budget 60%, which has a thin plastic case and plenty of hollow to work with, two layers of tape is a clear, repeatable change. On my foamed aluminum 65% it is nearly nothing, because there is no hollow ring left to fix. That contrast is the whole story of this mod.
Which tape to use
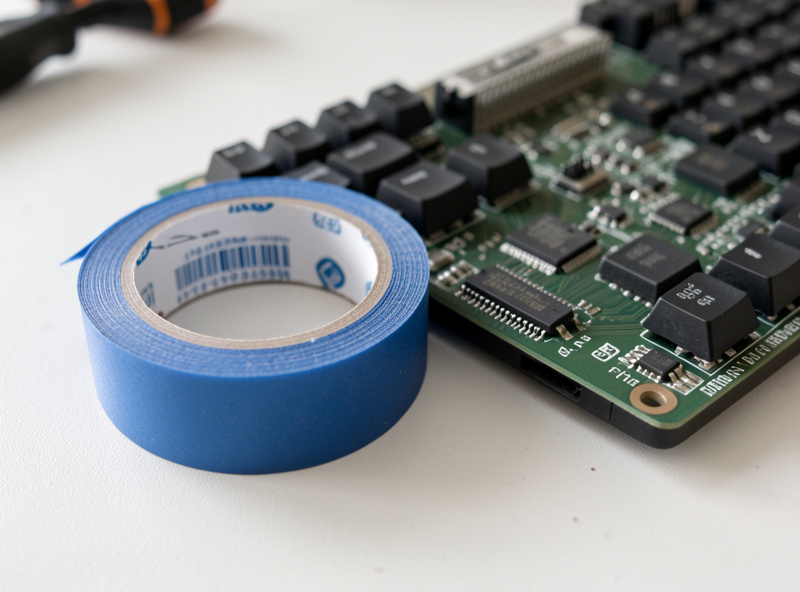
Plain blue painters tape is what I reach for, every time. It peels clean, leaves no residue on the PCB, and is thin enough that a couple of layers do not get in the way of the case closing. Avoid anything aggressive — packing tape, duct tape, electrical tape — because the adhesive can leave a gummy mess on the board and some of them are thick enough to interfere with how the assembly seats.
You do not need a special “keyboard tape.” The bag of painters tape from the hardware aisle is the same thing the community has used for years. If you want to grab a roll, a standard blue painters tape in a one-inch or two-inch width is perfect; the wider roll just means fewer overlapping strips.
As an Amazon Associate I earn from qualifying purchases.
How many layers
This is where people go wrong. More tape is not more better. One layer gives a subtle deepening; two layers is the sweet spot for most hollow boards; three is the most I would ever do. Past three layers you get diminishing returns, the sound starts to feel choked rather than full, and you risk the tape stack being thick enough to push against the case or interfere with the PCB seating flat.
The table below is how I rate the layers after running them on my budget board with a controlled recording between each step. Treat it as a starting point — your case and switches will shift the result — but the shape holds: the jump from zero to two layers is real, and everything after two is a small flavor adjustment.
| Layers | What changes | Best for | My take |
|---|---|---|---|
| 1 layer | Subtle deepening, slight ring reduction | Boards that already sound decent | A safe, gentle nudge |
| 2 layers | Clear deeper, more solid sound | Hollow plastic budget cases | The sweet spot |
| 3 layers | Deeper still, starts to lose openness | Very hollow, ringy cases | The honest maximum |
| 4+ layers | Choked, muddy, fit problems | Nothing | Skip it |
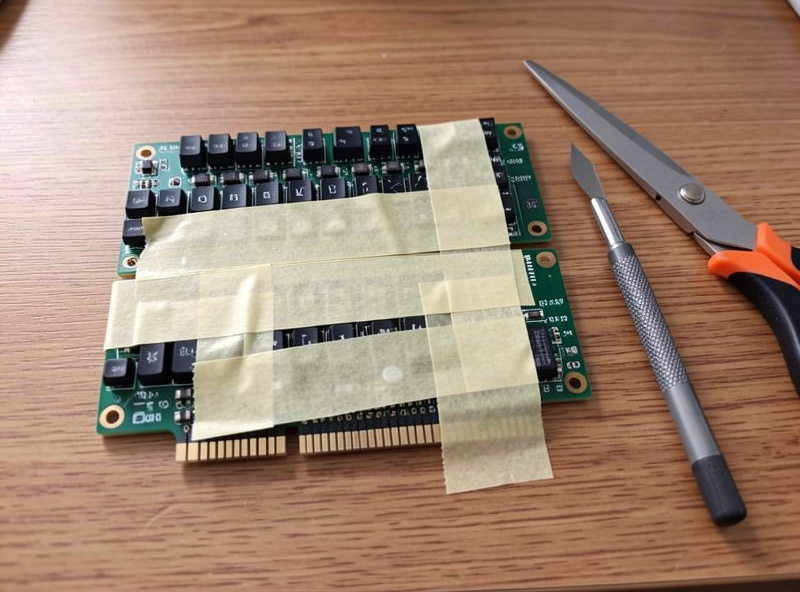
How I do the tape mod
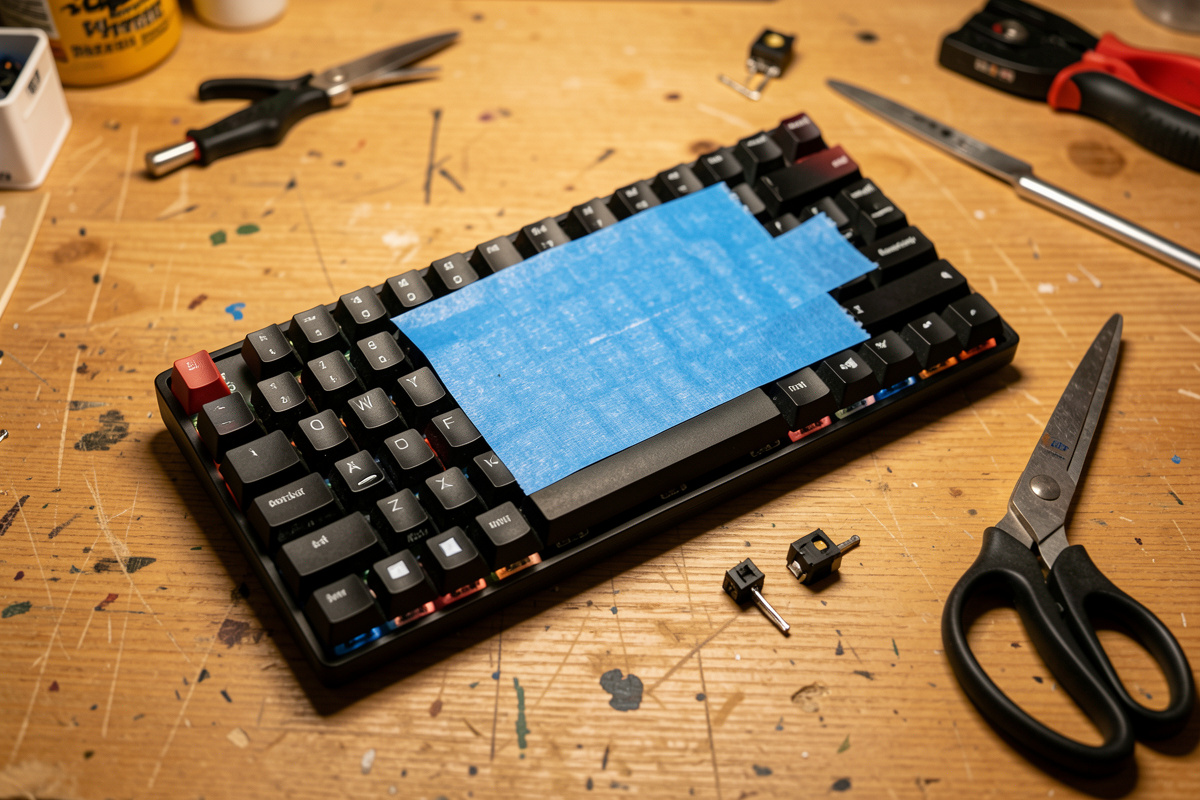
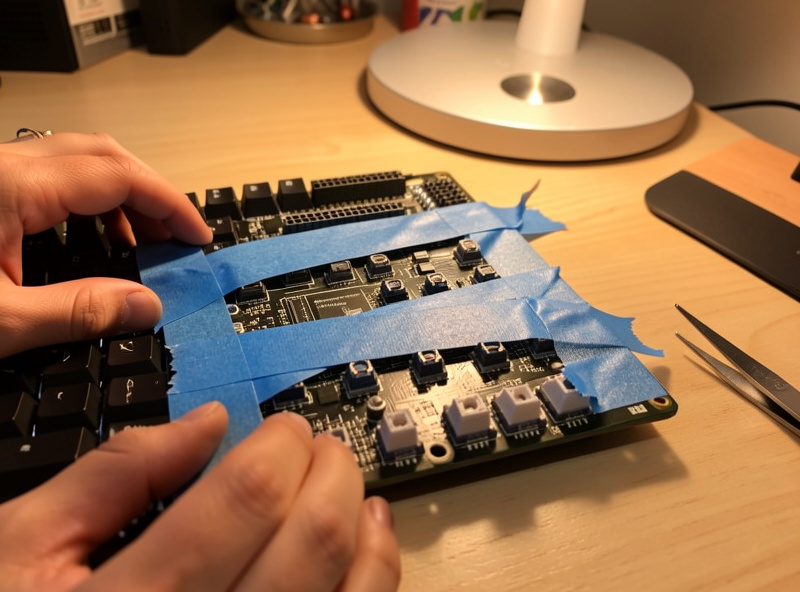
Disassemble the board far enough to get the PCB free of the case — on a hotswap board that usually means pulling the plate-and-PCB assembly out; on a solder build it comes out as a unit. Flip it so the back of the PCB faces up. Lay strips of tape across the board in even, slightly overlapping rows until the switch area is covered, then press them down so there are no bubbles or lifted edges.
Two things matter. First, do not cover the screw holes, mounting points, or any reset button, daughterboard connector, or exposed component you might need access to — cut the tape around them. Second, keep it flat; a lifted edge can stop the case from closing properly or, on a hotswap board, interfere with a switch pin. Add your second layer the same way, reassemble, and listen. If you want to compare honestly, record before and after without moving your mic.
Tape mod versus the other cheap mods
The tape mod plays well with others, and it is usually the first thing I do after tuning stabilizers. It stacks naturally with a PE foam mod — tape changes the reflection, foam changes the absorption, and together they clean up a hollow case more than either alone. On a big empty case, a tempest mod tackles the cavity echo that tape cannot fully reach.
What the tape mod will not do is fix scratchy switches or rattling stabilizers — those are different faults with different fixes. If your big keys rattle, start with a stabilizer tune and the spacebar rattle fix; if the keystroke feels gritty, you are in switch lubing territory. The tape mod is one piece of the larger cheap keyboard mods picture, not the whole thing.
What the change actually sounds like
People want a word for what the tape mod does, so here is mine from listening to dozens of before-and-afters on the same rig: the stock hollow board has a thin, slightly papery “tic” with a faint ring trailing each keystroke. After two layers of tape, that ring shortens and the body of the sound drops a little lower — the keystroke lands with more of a rounded “tok” than a hollow “tic.” It is not a new keyboard. It is the same keyboard with the cheap edge taken off.
The honest size of the change matters because it sets your expectations and protects you from chasing it. If you do the tape mod expecting the deep, marbly sound you saw in a video, you will be disappointed, because that board almost certainly also had lube, films, foam and a dense case doing most of the work. Tape is one small, repeatable contribution to that stack. Stacked with a foam mod and tuned stabilizers it adds up to a board that genuinely sounds better; on its own it is a gentle, worthwhile nudge.
To hear it for yourself without fooling yourself, set your phone on a stand, type a fixed sentence, do the mod without moving anything, and type the same sentence again. Listen back on the same earphones. If you cannot hear a difference, your board may already be dense enough that tape does nothing — and that is useful information, not a failure.
Is the tape mod worth doing?
On a hollow plastic board, yes, easily — it is the best return on effort in the whole hobby for the price of a coffee. On a dense, already-foamed board, save your tape; there is nothing for it to fix. The honest framing is that the tape mod is a small, reliable improvement on the boards that need it, and a placebo on the boards that do not. Knowing which board you have is the whole skill.
Do it after stabilizers, before you spend money on anything else, and judge it with a controlled recording rather than a memory of how it sounded yesterday. That is how you find out whether your particular board is one the tape mod helps — and most budget boards are.
Frequently Asked Questions
What does the tape mod do to a keyboard?
It adds reflective layers of tape to the back of the PCB, which deepens and solidifies the sound by changing how keystroke energy bounces in the case. The effect is clear on hollow plastic boards and minimal on dense, already-foamed cases.
What tape should I use for the tape mod?
Plain blue painters tape. It peels clean, leaves no residue, and is thin enough that two layers do not interfere with the case closing. Avoid duct, packing, or electrical tape, which can leave adhesive on the PCB or be too thick.
How many layers of tape is best?
Two layers is the sweet spot for most hollow boards. One layer is a subtle nudge, three is the honest maximum, and four or more chokes the sound and can cause fit problems. The biggest change is going from zero to two layers.
Will the tape mod make my keyboard quieter?
No. The tape mod changes the character and depth of the sound, not the volume. For a quieter board you want silent switches, o-rings to soften bottom-out, and a desk mat to kill surface ring. Tape shapes the tone.
Does the tape mod damage the PCB?
No, as long as you use painters tape and avoid covering screw holes, connectors, or exposed components. It peels off cleanly and is fully reversible in under a minute, leaving the board exactly as it was.
Does the tape mod work on every keyboard?
No. It shines on hollow plastic budget cases that ring and does almost nothing on dense aluminum boards that already have foam and dampening. Match the mod to the board: if your case sounds hollow, tape helps; if it already sounds full, skip it.