This information is for educational purposes. Keyboard work involves small parts, soldering irons, and electronics — work in a ventilated space when soldering, unplug boards before opening them, and modding a board may void its warranty. When in doubt, check the manufacturer's documentation first.
Lubing switches is the single most over-promised, under-explained mod in the hobby. Done right, it turns a scratchy stock linear into something that glides; done wrong, it slows your switches, kills tactility, and costs you an evening you don’t get back. I’ve run a lube station that has processed thousands of switches across every category in my drawer — linears, tactiles, clickies, the lubed and unlubed versions of the same switch sitting side by side for the only comparison that actually isolates the variable. This guide is the whole map: what lubing and filming really do, which lube goes where, the films question settled honestly, and how to decide whether any of it is worth your hours.
I’m going to be blunt about the parts the genre skips. Most lubing tutorials are filmed by people selling you lube. The before/after sound tests are recorded on different mics, at different distances, after the board itself was re-foamed — three variables changed, one credited. On my bench the rule is same switch, same mic, same distance, tuned vs stock. That methodology is the reason I trust my own verdicts and distrust most of what’s on the internet about this.
What lubing a switch actually does
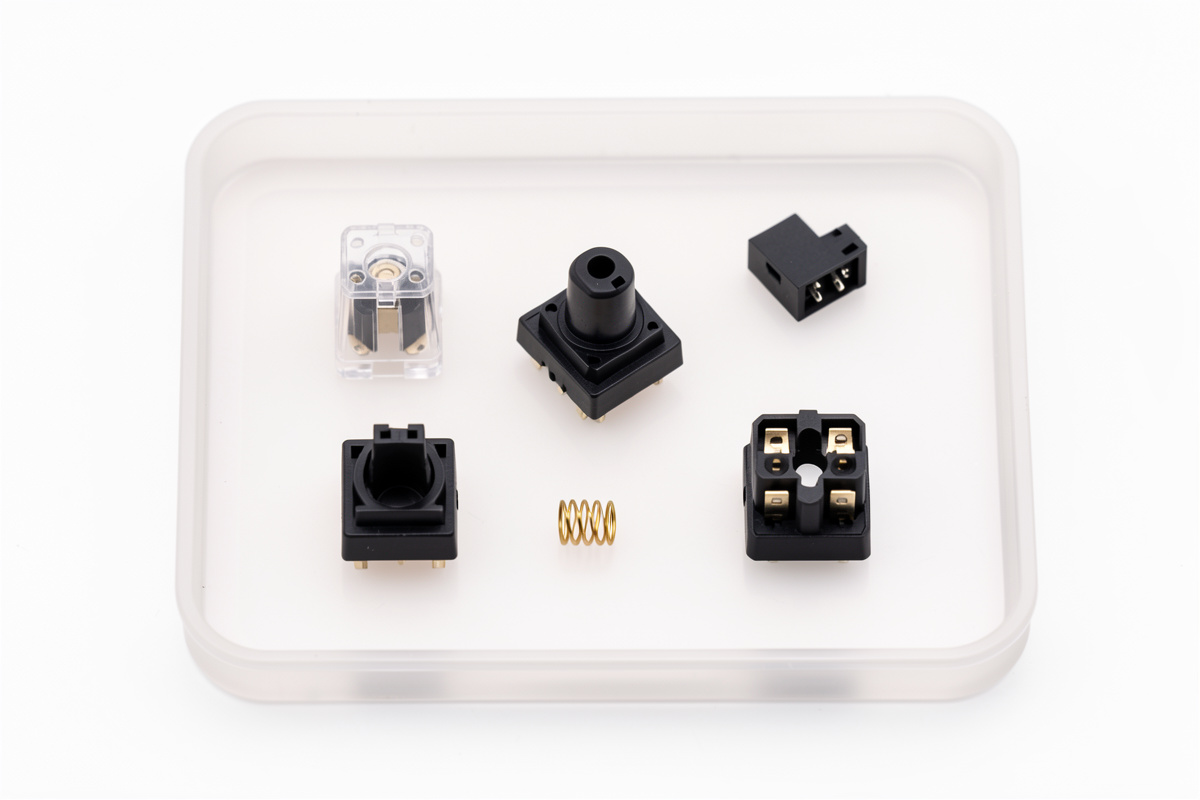
A mechanical switch is four or five plastic parts rubbing against each other thousands of times a day: a stem sliding inside a housing, a spring compressing against the stem and the bottom housing, leaf contacts wiping past the stem legs. Plastic-on-plastic friction is what you feel as scratch and hear as a high-frequency rasp. Lube is a thin film of grease or oil that sits between those surfaces so they slide instead of grind.
Three things change when you lube correctly:
- Scratch goes away. The gritty texture on the downstroke of a cheap linear is friction between stem rails and housing walls. A correct rail coat removes most of it. This is the biggest, most reliable improvement and the reason to lube at all.
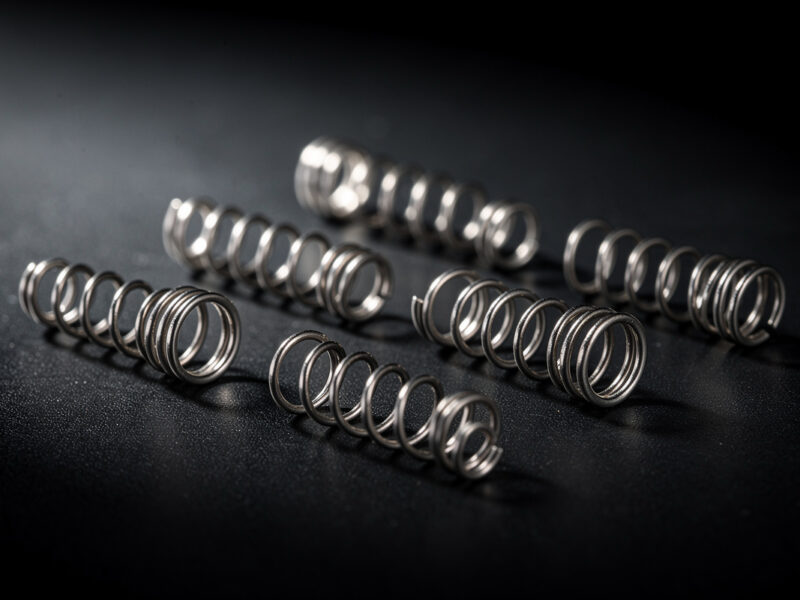
- Spring ping drops. A bare spring rings like a tiny bell when it compresses — a metallic “boing” layered under the keypress. A drop of oil on each end of the spring (or a bag-lube) damps that resonance. On boards with empty space under the plate, ping is the single ugliest sound artifact, and lube is the fix.
- Sound deepens slightly. Lube takes the high-frequency edge off the bottom-out and top-out, nudging the sound from “clack” toward “thock” — though I use those words with irony, because mounting and case foam move that needle far more than lube does. Anyone telling you lube alone transforms a board’s sound profile is overselling.
What lubing does not do: it doesn’t change the actuation force in any way you’ll feel (a properly thin coat adds nothing measurable to the spring weight), it doesn’t fix a wobbly stem, and it absolutely does not “improve” a tactile bump — done heavy-handed it rounds the bump off and makes a tactile feel mushy. More on that below, because it’s the most common mistake I see.
Lube vs film vs spring swap: the three switch mods, separated
These three get blended together in conversation and they shouldn’t be. They solve different problems, and stacking all three on a switch that only needed one is how people burn weekends chasing diminishing returns. Here’s how I separate them on my bench.
| Mod | What it fixes | Effort per switch | Reversible? | Worth it when… |
|---|---|---|---|---|
| Lubing | Scratch, spring ping, harsh high-end sound | High (open, brush, reassemble) | No (can’t un-lube cleanly) | Stock switch feels scratchy or sounds pingy |
| Filming | Top/bottom housing wobble and rattle; small sound consistency | Low (drop film, snap shut) | Yes (films pop out) | Housing halves fit loosely; you’re already opening the switch anyway |
| Spring swap | Weight (too light/heavy), and spring ping if swapping to a lubed/longer spring | Low-medium (swap part) | Yes (keep old springs) | You want a different bottom-out force or to kill ping at the source |
The practical reading of that table: lubing is the high-effort, high-payoff, irreversible one — commit only when you’ve decided the switch is a keeper. Filming is cheap insurance you do while you have the switch open. Spring swaps are about feel and weight, not smoothness, and they happen to be the cleanest fix for ping if you’d rather not lube springs at all — the spring swap and ping fix guide covers both the weight and the noise angle in one pass.
Choosing a lube: oils vs greases, and the only two names you need
Lubes split into two physical types, and the type matters more than the brand.
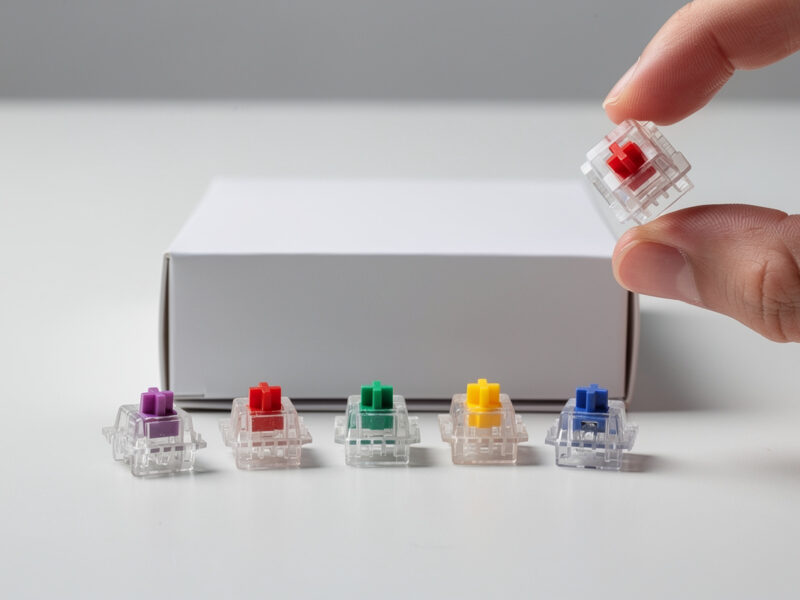
Greases are thick. They stay where you put them and build a durable film, which makes them right for the high-friction sliding surfaces: stem rails and the inside walls of the housing. The hobby standard for linears is Krytox GPL 205 Grade 0 (written “205g0”) — a PTFE-thickened grease with a consistency that brushes on thin and doesn’t migrate. For tactiles, many builders step to a thinner grease so they don’t drown the bump.
Oils are thin and self-leveling. They’re wrong for sliding surfaces (they migrate and wear through) but right for springs, where you want a light damping film, and for the leaf on tactiles where a heavier grease would mute the snap. Tribosys 3203 is the common pick for tactiles because it’s light enough to lube a tactile without killing the bump; it behaves between a true oil and a thin grease.
Two rules I never break: match lube viscosity to the switch type (thicker for linears, thinner for tactiles), and thin is right, thick is wrong. The number one beginner error is too much lube — a glob that pools, slows the return, and makes the switch feel dead. You want a sheen, not a coat. I’ll go deep on the 205g0-vs-3203 decision in the dedicated comparison, because it’s the question that gets asked more than any other.
Where the lube goes: a part-by-part map
This is the part that separates a switch that glides from one that feels worse than stock. The application points are specific.
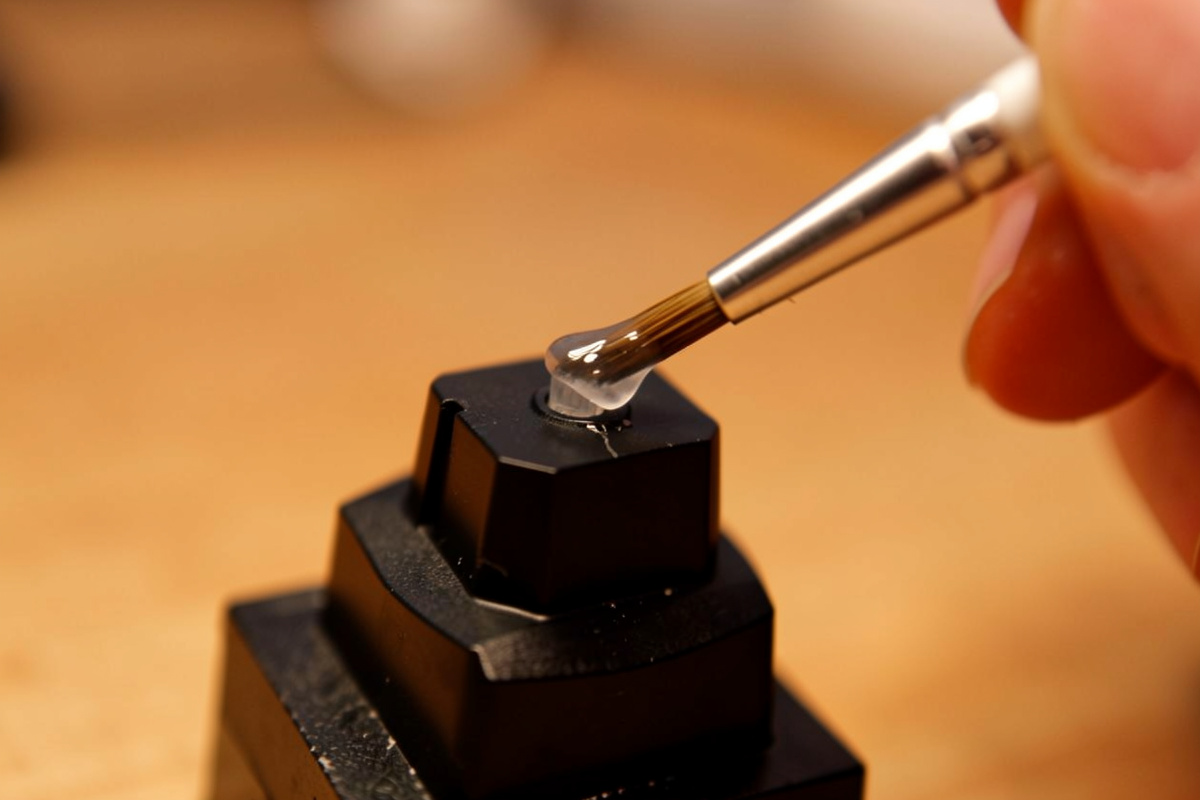
- Stem rails (the two long sides): a thin, even coat. This is where 80% of the smoothness comes from. Brush along the direction of travel, both rails.
- Bottom housing rails and the slider walls: a light pass on the surfaces the stem rails actually contact. Don’t flood the bottom of the housing.
- Spring: bag-lube (a drop in a bag, shake) or a tiny dab on each end. This kills ping. Springs are the place oil belongs.
- Stem legs (tactiles only, lightly or not at all): the legs wipe the leaf. On a tactile, a feather-light touch here smooths the bump’s scratch — but go heavy and you mute the tactility. On linears, leave the legs alone; lube here can cause inconsistent actuation.
- Top housing: usually nothing. Some builders lightly lube the four corners where the slider guides ride. Optional and minor.
Never lube: the metal leaf contacts themselves on the actuation point (you can cause chatter or dead keys), and never use a conductive or contact-cleaner product anywhere near the leaf. Standard switch lubes are non-conductive greases — keep it that way and keep it off the contact face.
Filming: what films actually change
A switch film is a thin gasket — usually 0.1mm to 0.3mm of polycarbonate or thin foam — that sits between the top and bottom housing when you reassemble the switch. Its job is to take up the manufacturing slop between the two housing halves so they clamp tighter.
What you get: less housing wobble, a marginally more consistent sound from switch to switch, and a slightly fuller bottom-out on some switches because the housing rings less. What you do not get: a transformed switch. Films are a small, real, second-order improvement. On switches with already-tight housings (many modern Gateron and Cherry molds), films can make almost no audible difference. On older or looser molds, they tighten things up noticeably.
The honest verdict I give everyone: film because you already have the switch open to lube it. Adding films to a lubing pass costs you maybe ten seconds per switch. Opening switches a second time just to film them is rarely worth it. The switch films deep-dive covers thickness selection (0.15mm is my default; 0.2mm+ only on the loosest housings) and the polycarbonate-vs-PE difference.
The lube station: doing this without losing your mind
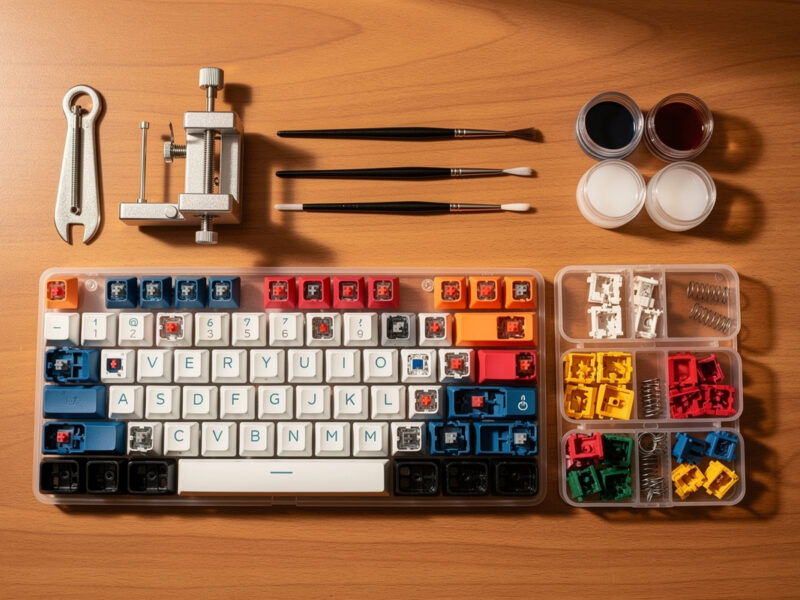
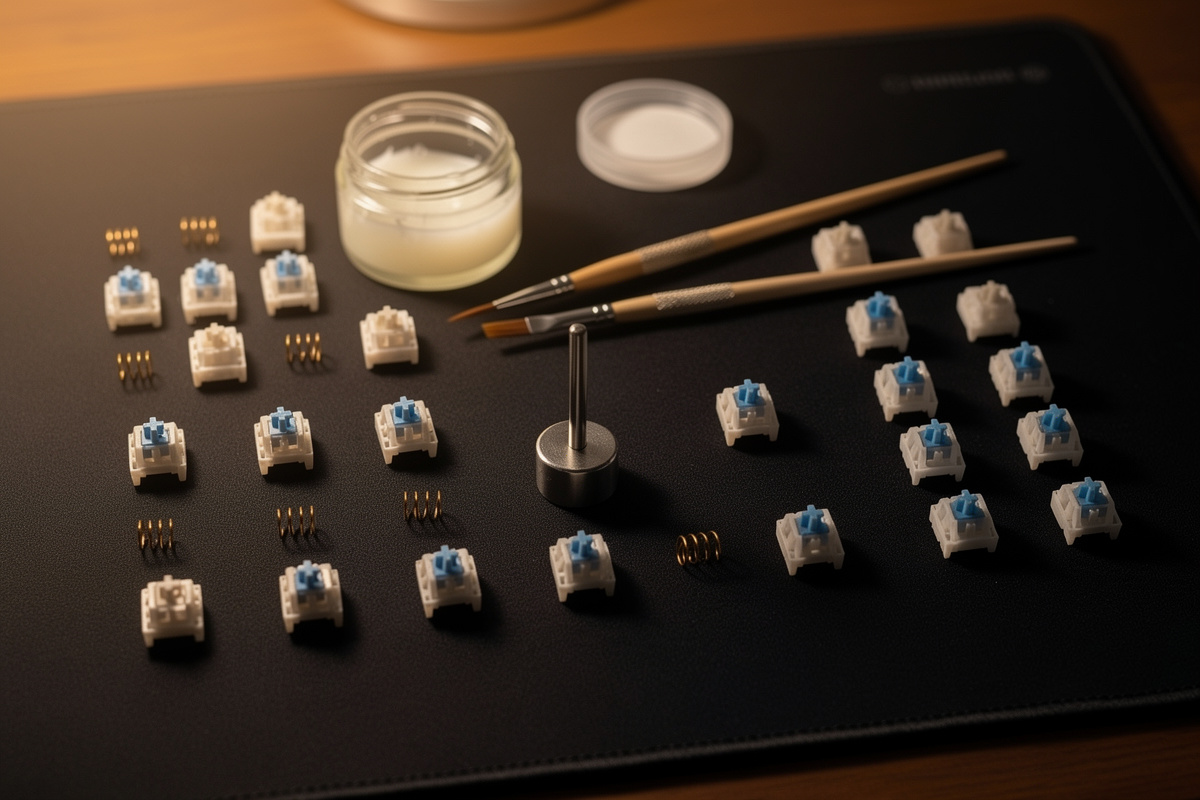
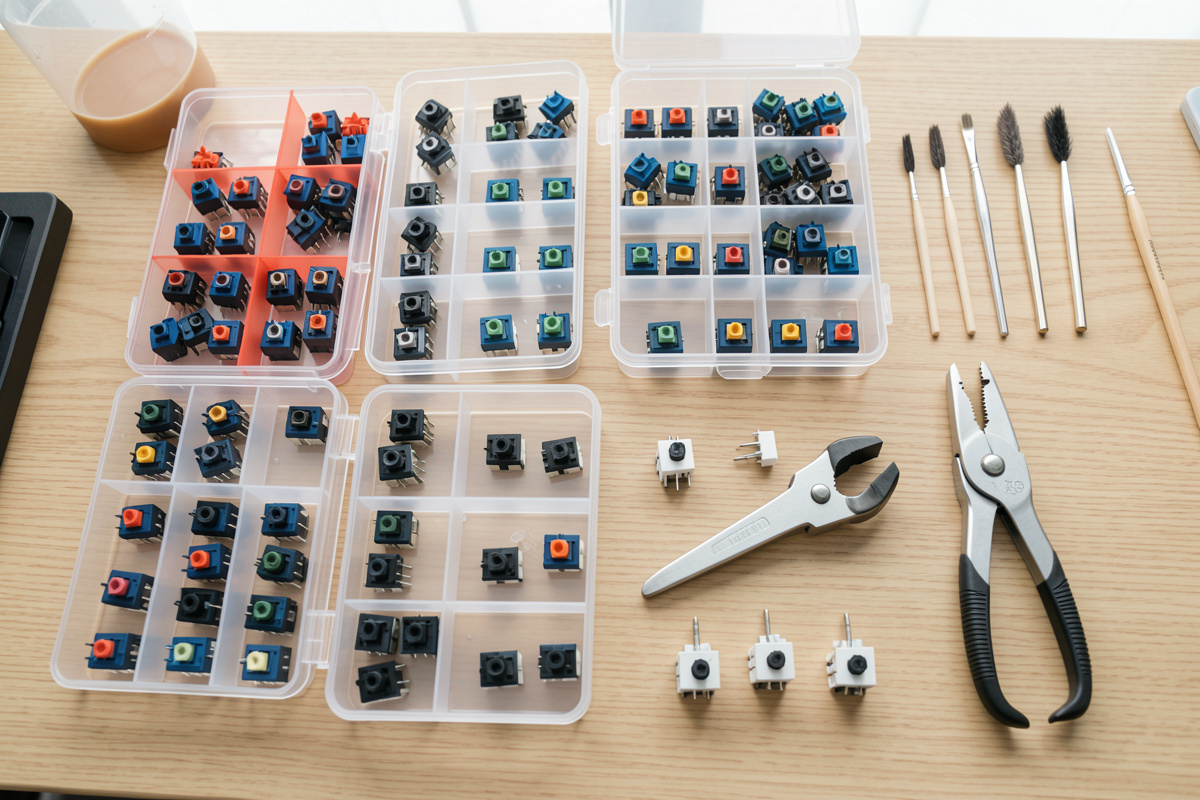
Lubing one switch is a craft project. Lubing ninety is an assembly line, and the difference between an enjoyable afternoon and abandoning a half-done board is entirely about workflow. My station has processed thousands of switches, and the setup is boring on purpose: a switch opener, a stem holder so I’m not pinching tiny parts, a fine brush kept for grease only, a separate setup for spring lube, and trays that move parts through stages so I never lose track of which housings are done.
The batch logic that saves the most time: process in stages, not switch by switch. Open all of them. Spring-lube all of them in a bag at once. Then brush stems in a rhythm, reassemble in a rhythm. Doing all of one step before the next is dramatically faster than completing one switch start-to-finish and repeating ninety times. I cover the full station layout and the realistic time budget in the switch lube station workflow guide — and yes, I’ll tell you honestly how long ninety switches actually takes, because the “30 minutes” claims are fantasy.
Factory-lubed switches: do you even need to do this anymore?
This is the question that has genuinely changed in the last few years. Factory lubing used to be a sloppy afterthought — uneven, inconsistent, often worse than stock. It has gotten dramatically better. Several current switches ship with a competent factory lube job that is, honestly, good enough for most people most of the time.
So the real question isn’t “is factory lube as good as hand lube” (a careful hand job still edges it on consistency), it’s “is the marginal improvement worth your hours for your use case?” For a daily driver you type on and don’t obsess over, modern factory-lubed switches are a legitimate finish line. For a build where the tuning is the point — where you enjoy the bench time and want the last 10% of consistency — hand lubing still wins. I unpack exactly which factory jobs hold up in the dedicated piece; it’s the most “buy nothing, do nothing” advice on this whole site, and I stand behind it. For the full verdict on whether you can skip the lube station entirely, read are factory-lubed switches worth it.
The tools you actually need (and the ones you don’t)
The kit for lubing is small and most of it is cheap. The marketing around it is not, so here’s the honest separation between what does real work on my bench and what’s drawer-filler.
The essentials. A switch opener that matches your stem mounts (the cheap two-sided plastic ones are fine — I’ve used the same kind for years). A stem holder, which is the single biggest quality-of-life upgrade: trying to brush a stem you’re pinching between two fingers is how you end up with lube on everything but the rails. A genuinely small, fine-bristled brush — I keep one brush for grease and a different one for thin oil so I never cross-contaminate viscosities. And the lubes themselves: one grease for linears, one thinner lube for tactiles, a light oil for springs. That’s the whole core kit.
The nice-to-haves. A small zip bag for spring bag-lubing (a sandwich bag works). Tweezers for placing films and fishing out springs. A silicone mat so dropped parts don’t roll off the desk into the carpet — the great switch graveyard. None of these are required; all of them make a ninety-switch session less aggravating.
The stuff you can skip. Ultrasonic cleaners for switches (overkill for anything but heavy restoration), expensive “switch tuning kits” that bundle a dollar’s worth of brush with a markup, and any product promising a single magic lube for every switch type. There isn’t one — viscosity has to match the switch, and a do-everything lube is a compromise on both ends. Buy the two lubes that matter and ignore the bundles.
The mistakes that make a lubed switch worse than stock
Lubing has a failure mode most mods don’t: a bad job leaves you measurably worse off than doing nothing. After processing thousands of switches I’ve made every one of these at least once, so here they are in order of how often they ruin a build.
Too much lube. This is the cardinal sin and it accounts for most disappointed first-timers. A thick coat pools in the housing, slows the spring’s return so the switch feels sluggish, and on tactiles drowns the bump entirely. The fix is discipline: load the brush, then wipe most of it off on the lid, then apply. You should see a sheen catch the light, never a visible bead of grease.
Wrong lube on the wrong switch. Thick linear grease on a tactile mutes the snap; thin oil on linear rails wears through and the scratch comes back in weeks. Match viscosity to switch type — this is the rule that separates someone who’s read about lubing from someone who’s done it.
Lubing the leaf or the legs on a linear. Grease on the metal leaf at the contact point causes intermittent actuation, chatter, or dead keys — the worst possible outcome because it’s a functional failure, not just a feel one. Keep all lube off the actuation contact, and leave linear stem legs bare.
Inconsistent application across the batch. If switch one gets a heavy coat and switch ninety gets a feather, your board feels uneven and you’ll never quite place why. Batch processing with a fixed brush-load routine is as much about consistency as it is about speed.
Reassembling a film wrong. A film that’s pinched or off-center stops the housing from closing flush and the switch feels gritty or won’t snap shut. If a switch resists closing after filming, open it and reseat the film rather than forcing it.
How long lube lasts, and when to redo it
A correctly lubed switch — thin coat, right viscosity, on the rails where it belongs — holds up for a very long time under normal daily typing. We’re talking the kind of timeframe where you’ll have moved on to a new board long before the lube wears out. The PTFE greases in particular are durable; that’s why they’re the standard.
The cases where lube genuinely wears down are heavy gaming use on a small cluster of keys (WASD takes far more actuations than the number row), and any switch where you used too thin an oil on the sliding surfaces — oil migrates off rails over time, which is exactly why grease belongs there and oil belongs on springs. If a previously smooth switch develops scratch again on just a few keys, that’s the wear pattern, and a re-lube of those specific switches fixes it without redoing the whole board.
One thing I don’t do: pre-emptively re-lube on a schedule. Lube when a switch tells you it needs it — scratch returns, ping creeps back — not on a calendar. The hobby has enough rituals that feed the drawer without inventing maintenance that isn’t needed.
The honest bottom line on whether to lube at all
Lubing is worth it when a switch is scratchy or pingy and you’re keeping it. It is not worth it as a reflex on every switch you own, it is not a magic sound transformation, and it is the wrong first move if your real problems are a rattly stabilizer or a boomy empty case (foam and stab tuning fix those, and they’re higher ROI). The hobby loves to sell lubing as the gateway ritual. It’s a genuinely good mod with a clear job — and the builder who knows when not to do it is the one who actually understands switches.
Everything below drills into one decision at a time: whether the hours pay off, which lube, what films really do, killing ping at the spring, running a real station, and whether factory lube has made the whole exercise optional. Read them in any order — they’re written to stand alone.
Frequently Asked Questions
Does lubing switches really make a difference?
Yes, on the right switch. Lubing removes the gritty scratch on linears and the metallic spring ping on most switches — both are clearly audible and feelable improvements. What it does not do is transform a switch’s whole character or change its weight. The biggest, most reliable gain is killing scratch; sound deepening is real but minor compared to case foam and mounting.
What lube should I use for switches?
For linears, a thick PTFE grease such as Krytox 205g0 on the stem rails and housing. For tactiles, a thinner lube like Tribosys 3203 so you do not mute the bump. Use a light oil on springs to stop ping. The rule that matters more than the brand: thicker grease for linears, thinner for tactiles, and always thin coats — too much lube is the number one beginner mistake.
Should I lube tactile switches?
You can, but carefully. Lube the rails to remove scratch, use a thin lube, and go feather-light or skip the stem legs entirely — heavy lube on a tactile rounds off and mutes the bump, which is the opposite of what you want. Many builders only spring-lube their tactiles to kill ping and leave the bump alone.
What is the difference between lubing and filming a switch?
Lubing reduces friction between the moving parts (fixing scratch and ping) and is irreversible. Filming adds a thin gasket between the housing halves to take up wobble and tighten the switch, and is reversible. They solve different problems. Film while you already have the switch open to lube — doing both in one pass costs almost no extra time.
Are factory-lubed switches good enough now?
For most people, increasingly yes. Modern factory lube jobs are far better than they were a few years ago and are a legitimate finish line for a daily driver. Careful hand lubing still wins on consistency for builds where the tuning is the point, but factory lube has genuinely made hand lubing optional for casual use.
How long does it take to lube a full keyboard of switches?
Realistically several hours for a full board of around 70 to 90 switches your first time, dropping as your workflow improves. Anyone claiming 30 minutes is either skipping steps or has not actually done it. The fastest method is batch processing — opening all switches, spring-lubing in a bag at once, then brushing stems in a rhythm — never completing one switch at a time.
Guides in This Series
- Is lubing switches worth it — the honest hours-vs-payoff math
- Krytox 205g0 vs Tribosys 3203 — which lube for which switch
- Switch films explained — what they actually change
- Switch spring ping fix — killing the boing at the source
- Switch lube station setup — the batch workflow
- Are factory-lubed switches good enough now