This information is for educational purposes. Keyboard work involves small parts, soldering irons, and electronics — work in a ventilated space when soldering, unplug boards before opening them, and modding a board may void its warranty. When in doubt, check the manufacturer's documentation first.
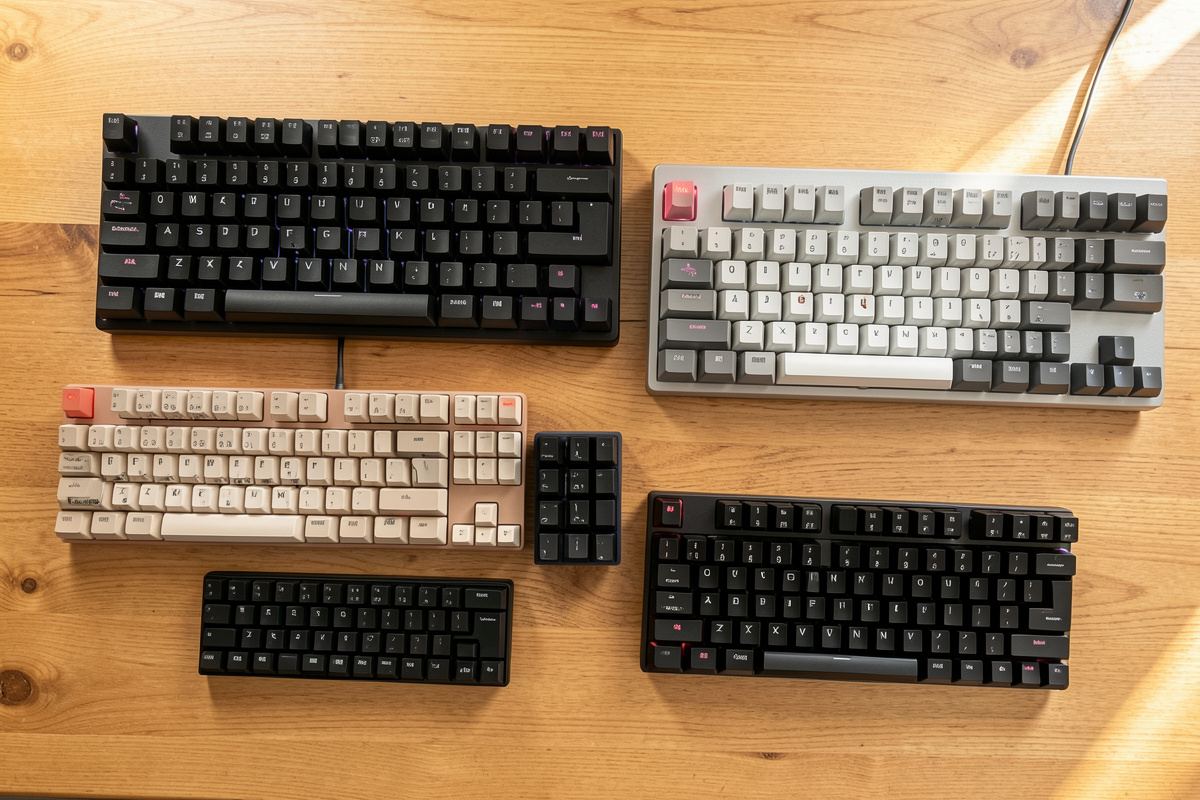
A keyboard layout guide comes down to one trade you make over and over: how many keys you keep within finger reach versus how much desk you give back. The honest map runs from full-size (104 keys) down to a 40% (around 47), and almost everyone lands happiest somewhere in the 65% to TKL band. Everything past that is preference, not progress.
I have owned and typed eight hours a day on most of these sizes — a hotswap 75% as my daily driver, a self-soldered aluminum 65%, a stock budget 60% I keep as the “before” in every comparison, and an Alice experiment that taught me more about my own typing than any spec sheet. This guide is the build-honest version: what each layout actually costs you in muscle memory, where the marketing oversells, and how to pick without buying four boards to find out like I did.
What Does Keyboard Layout Actually Mean?
Keyboard layout, in this hobby, almost always means size and key count — how much of the full 104-key board the designer kept and what they cut. The standard ladder is full-size (100%), 1800-compact (96%), tenkeyless (80%, no numpad), 75%, 65%, 60%, and 40%. The percentage is rough shorthand for width, not an exact key ratio, so treat it as a category name rather than a measurement.
Two boards labeled “65%” can differ by a key or two, because there is no governing standard — only convention. What stays constant is the cutting order: the numpad goes first, then the function row, then the dedicated arrow and navigation clusters, then the number row last. Knowing that order tells you exactly what you are giving up at each step down, which is the whole decision in one sentence: you are trading dedicated keys for layers you reach with a function key.

Full-Size and TKL: The Two Boards Most People Actually Need
Full-size (104 keys) keeps everything: function row, numpad, arrows, navigation cluster. Tenkeyless (TKL, 87 keys) drops only the numpad and keeps the rest. For the overwhelming majority of people who do not live in spreadsheets, TKL is the quiet sweet spot — full muscle memory, no relearning, and the mouse moves several centimeters closer to home because the numpad is gone.
That mouse-distance change is the single most underrated reason to go TKL, and it is the first thing my shoulder noticed when I switched. If you crunch numbers all day, the numpad earns its keep and full-size is the right call — I am not going to pretend ten-key data entry is faster reaching across a layer. But if you reach for the numpad twice a week, you are paying real desk width for a convenience you rarely use. The full breakdown of who actually needs a numpad is its own honest conversation.
There is a middle option most people miss: the 96% or “1800-compact” layout, which keeps the numpad but shoves it tight against the main block and steals back the dead space full-size boards waste. It is the answer for the person who genuinely needs ten-key but hates how wide a normal full-size sprawls. I do not run one daily, but I have recommended it to spreadsheet-heavy friends who refused to give up the numpad and still wanted their mouse closer — it threads that needle better than either extreme.
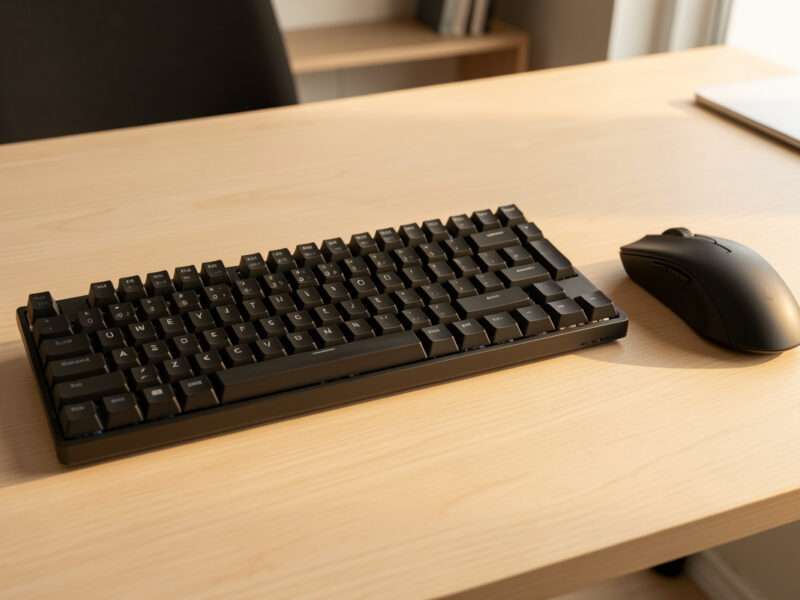
75% and 65%: The Compact Boards Worth Buying First
75% takes the TKL and squeezes it: function row and arrows stay, but the columns pack tight against each other and the right-side navigation keys get compressed or moved. 65% goes one step further — it drops the function row entirely (you get it on a layer) but keeps dedicated arrow keys, which is the line most people are not willing to cross. Lose the arrows and you feel it immediately; lose the F-row and you barely notice after a week.
This is the band I steer almost everyone toward, and my daily driver lives here. A 65% gives you a compact, tidy board with arrows you can find blind, and a 75% buys back the function row for the cost of slightly cramped spacing. The trade between them is genuinely close, which is why the 65% vs 75% layout comparison deserves its own deep look. If you are choosing your very first board on a budget, the 65% vs 75% as a first-board decision covers the buying side specifically.
60% and 40%: Where Layers Become a Lifestyle
60% (around 61 keys) drops the function row, arrows, and navigation cluster — everything lives on a function layer accessed by holding a key. 40% (around 47 keys) drops the number row too, so even digits become a layer. The 60% is a clean, popular minimalist board once you accept layered arrows; the 40% is a genuine commitment that rewires how you type and is not for everyone, no matter how good it looks on a desk.
I keep a stock budget 60% precisely because it is the honest floor of “still usable without thinking too hard.” Below that, you are buying into a hobby-within-a-hobby. The 40% can be brilliant for the right person — programmers who love keymaps, people with small hands, travelers who want a board that fits in a jacket pocket — but the breathless videos rarely mention the two-week period where you cannot type a password without swearing. My honest 40% use-case guide is the reality check I wish I had read first.
HHKB: The Layout That Earned Its Cult
The HHKB (Happy Hacking Keyboard) layout is a specific 60%-class arrangement built around touch-typists and Unix users: no dedicated arrows, Control where Caps Lock usually sits, a split right shift, and a deliberately minimal footprint. It is less a “size” than a philosophy about where your hands should never have to leave the home row. People either adapt and evangelize or bounce off it hard.
I respect the HHKB layout more than I love it, and I will say plainly that the legendary Topre switches under most HHKBs are a separate conversation from the layout itself. What the layout gets right is the Control-key placement, which is genuinely better for anyone living in a terminal. What it asks in return is that you relearn arrows as a layer and accept a non-standard bottom row. The full HHKB layout explanation breaks down each deviation and whether it is worth adopting even on a non-Topre board.
Alice and Split: Layouts That Change Your Hands, Not Your Keys
Alice and split layouts keep roughly a 65%-to-TKL key count but rearrange the physical geometry: the two halves of the alphanumeric block angle outward (Alice) or separate entirely into two pieces (true split), so your wrists sit straighter instead of pronating inward. This is the one category where “layout” stops meaning size and starts meaning posture. The keys are familiar; the shape is not.
My Alice experiment was the most surprising board I have owned — the adjustment was about three days, and the angled home position felt natural faster than I expected. I will stay carefully on the comfort-and-preference side of this and let you read the research yourself, because typing-feel is personal and I am a builder, not a clinician. If the idea of angling your hands appeals to you, start with the Alice layout explained and the broader split keyboard ergonomics honest guide. The desk the board sits on matters as much as the board — geometry, arm support, and height are covered over at ergodeskspecs if you want the full setup picture.
How Layers Replace the Keys You Drop
Every key a small board removes does not vanish — it moves to a layer, a second set of assignments you reach by holding a modifier (usually a key labeled Fn or a thumb key). Hold the layer key and the number row becomes F-keys, or the right-hand cluster becomes arrows. This is the mechanism that makes a 60% or 40% usable at all, and understanding it removes most of the fear people have about going compact.
The thing nobody tells beginners is that layers are reprogrammable. Nearly every enthusiast board runs firmware (QMK or VIA-compatible) that lets you put arrows, media keys, and shortcuts wherever your fingers want them. I flash and configure my boards confidently — that part is just calibration with a config file instead of a brush — though I will be honest that designing a PCB from scratch is someone else’s bench, not mine. What matters for layout choice is this: a good layer setup can make a 65% feel like it lost nothing, while a lazy default layer can make the same board frustrating. The board gives you the canvas; the keymap is the painting.
This is also why “I lost the arrows” panic is overblown for most sizes. On my 65% the arrows are dedicated and physical; on the 60% in my drawer they sit under a layer on the right-hand letters, and after a week my fingers stopped thinking about it. The relearning cost is real but front-loaded — steep for a few days, then gone. The boards that genuinely stay hard are the ones where you removed a key you actually use constantly, like the number row on a 40%, because no layer fully erases the cost of a key you press hundreds of times an hour.
Staggered, Ortholinear, and Column-Stagger: One More Axis
Size is the main axis, but it is not the only one. The standard board you grew up on is row-staggered — each row offset sideways, a holdover from typewriter mechanics. Ortholinear boards put keys in a perfect grid, and column-staggered boards (common on splits) offset by column to match finger length instead of historical accident. These cut across every size: you can have a 40% ortho or a 65% staggered.
I keep this guide focused on the size ladder because that is the decision ninety percent of buyers are actually making, and row-staggered is the default that needs no relearning. But if you are already considering a split, the column-stagger question rides along with it, and it is worth knowing the grid options exist before you assume every small board types like your laptop. Ortho has a devoted following and a real adjustment period; it is a deeper rabbit hole than this guide goes, and most people never need to climb in.
How I Would Choose for Five Different People
Layout advice gets useful when it stops being generic, so here is how I would actually steer five specific people. The accountant who lives in a numpad: full-size, no debate, the ten-key earns its width. The office worker who wants a cleaner desk and a closer mouse but never wants to think about their keyboard: TKL, every key where they expect it.
The first-time hobbyist who wants the “real” custom experience without pain: a 65% hotswap, dedicated arrows, compact, the band the whole hobby is built around. The programmer who loves tinkering and lives on the home row: a 60% or HHKB layout, where the Control placement and layered navigation actually reward the relearning. And the person whose hands feel cramped typing straight-on: an Alice or split, accepting a few days of adjustment for a home position that sits more naturally. Notice that not one of those answers is “the smallest board” — size for the job, not size for the flex.

What a New Layout Will Not Fix
A smaller or fancier layout changes where keys are; it does not change how the board sounds, feels, or types under your fingers. People buy a 65% expecting the deep, satisfying sound from a video and get a hollow, pingy board, because that sound came from the case, foam, and stabilizer tuning, not the size. Layout is the skeleton; switches, stabs, and mods are the flesh.
If your current board feels scratchy or sounds bad, a layout change is the wrong fix — that is a tuning problem, and the highest-return work in the whole hobby is a good stabilizer tune and a careful switch lube, not a new size. I have watched people spend hundreds chasing layouts when forty dollars of lube and a stabilizer kit would have solved what actually bothered them. Pick your size for ergonomics and key access; fix feel and sound with tuning. The two decisions are independent, and conflating them is the most expensive mistake in the hobby.
The Honest Decision Framework
Pick by what you cannot give up, not by what looks coolest. If you need a numpad daily, go full-size. If you want every standard key but a closer mouse, go TKL. If you want compact-but-familiar, go 65% or 75%. Only drop to 60% or below if layered navigation genuinely appeals to you, and only go Alice or split if hand angle is your actual goal. That covers ninety percent of buyers in four sentences.
The mistake I watch people make constantly is chasing the smallest board their favorite YouTuber uses, then quietly hating the layer-dance for a month before selling it at a loss. A keyboard is a tool your hands touch all day; the right size is the one you forget about, not the one that impresses a stranger. If you are still assembling the whole picture, the first custom keyboard guide ties layout into switches, keycaps, and budget, and the barebones vs prebuilt decision covers how you actually buy the board once you know the size. A simple 65% hotswap board is where I tell most first-timers to start.
As an Amazon Associate I earn from qualifying purchases.
Keyboard Layouts Compared: Size, Keys, and What You Lose
This is the at-a-glance map. Key counts are typical for the class and vary by a key or two between boards, since there is no governing standard for any of these sizes.
| Layout | Typical keys | What it drops | Best for |
|---|---|---|---|
| Full-size (100%) | 104 | Nothing | Daily numpad users |
| TKL (80%) | 87 | Numpad | Most people, closer mouse |
| 75% | ~84 | Spacing, some nav | Compact with function row |
| 65% | ~68 | Function row | Compact with real arrows |
| 60% | ~61 | Arrows, nav, F-row | Minimalists OK with layers |
| 40% | ~47 | Number row too | Layer enthusiasts, small hands |
| Alice / split | ~65 to 87 | Nothing (re-angled) | Straighter wrist preference |
Frequently Asked Questions
What keyboard layout is best for beginners?
A 65% or TKL is the best starting layout for most beginners. A 65% keeps dedicated arrow keys while staying compact, and a TKL keeps every standard key while moving the mouse closer. Both avoid the steep relearning curve of 60% and smaller boards, where navigation moves to a function layer.
What does percent mean in keyboard sizes?
The percentage is rough shorthand for width relative to a full-size board, not an exact key ratio. A 60% is about 60 percent the width of a full-size, a 75% is more compact than a TKL, and so on. Because there is no governing standard, two boards with the same label can differ by a key or two.
Do you lose function keys on a 65% keyboard?
Yes. A 65% drops the dedicated function row, so F1 through F12 move to a layer accessed by holding a function key. You keep dedicated arrow keys, which is the main reason people choose 65% over 60%. Most users adapt to layered F-keys within a week because they are pressed far less often than arrows.
Is a 40% keyboard practical for everyday use?
It can be, but only after a real adjustment period. A 40% drops the number row as well as arrows and the function row, so digits and symbols live on layers. Programmers who love custom keymaps, people with small hands, and travelers often adapt well. Heavy spreadsheet or data users usually do not.
Are split and Alice keyboards better for comfort?
Many people find angled or split layouts more comfortable because the hands sit straighter instead of rotating inward, but this is a preference, not a medical claim. The keys are standard; only the geometry changes. Expect a few days of adjustment as your muscle memory adapts to the angled home position.
What is the most popular keyboard layout in the hobby?
The 65% and 75% layouts dominate the custom keyboard hobby because they balance compact size against keeping arrow keys and, on 75%, the function row. They are the default for most group buys and prebuilt enthusiast boards, which is why beginners are usually steered toward this band first.