This information is for educational purposes. Keyboard work involves small parts, soldering irons, and electronics — work in a ventilated space when soldering, unplug boards before opening them, and modding a board may void its warranty. When in doubt, check the manufacturer's documentation first.
A keyboard’s sound is not one part — it is the whole stack working together: the switch, the keycap, the plate, the case material, whatever foam is or isn’t inside, and how the board is mounted. The single biggest surprise for most builders is that the switch is the smallest contributor. A hollow $40 board and a $300 board running the identical switch sound nothing alike, and the gap is mostly the case.
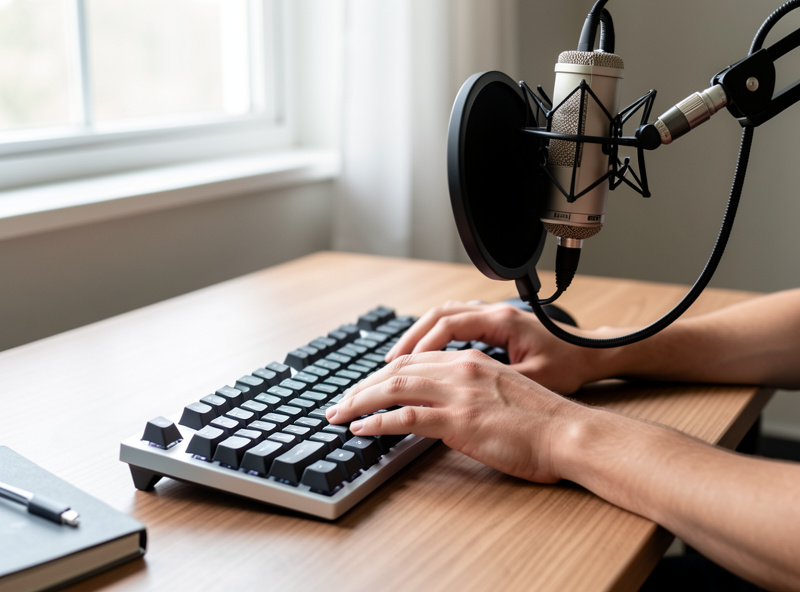
I have been chasing keyboard sound the slow way for years — same mic, same distance, same desk, recording the before and after of every change I make. That controlled habit is the whole reason this guide exists. The hobby is drowning in sound tests recorded on phone mics in rooms with different acoustics, and those clips have steered more people toward the wrong purchase than any spec sheet ever did. This is the map of what actually moves a keyboard’s sound, ranked by how much it matters and how much it costs you.
What “Keyboard Sound” Actually Is
When a key bottoms out, three things happen almost at once: the stem slams into the switch housing, the keycap stops against the switch, and that energy travels into the plate, the PCB, and the case, which all resonate. What your ears register as “the sound” is the sum of every one of those events plus the room you are sitting in. Change any layer and you change the result.
This is why I am allergic to one-clip comparisons. Two boards recorded in two rooms with two mics tell you almost nothing. On my bench, the only comparison I trust is the controlled one — one variable changed at a time, everything else held still. When a switch swap is the only difference, you hear the switch. When the only difference is a sheet of foam, you hear the foam. The rest of this guide treats each layer that way: what it does, and what it does not do, separated honestly.
The Sound Vocabulary: Thock, Clack, Marble, Poppy
Before you can chase a sound you have to name it, and the hobby’s vocabulary is half useful, half marketing. “Thock” describes a deep, lower-pitched bottom-out — the sound people pay the most to chase. “Clack” is brighter and higher-pitched, sharper on the top-out. “Marble” and “poppy” are texture words for the tighter, rounder sounds tuned boards make. None of these are precise, and people use them to mean different things, which is exactly why I treat the words with irony and trust recordings instead.
The most important thing to understand is that thock and clack are not opposites you pick between by buying a switch. They are points on a spectrum that the entire build pushes you along. A deep board leans thocky; a hollow or bright board leans clacky. I broke this down in detail in my piece on clacky versus thocky keyboards, and the follow-up on what actually makes a keyboard sound deep and thocky — because nine times out of ten the answer is the case, not the switch the marketing put on the box.
Switches: The Smallest Part of the Sound
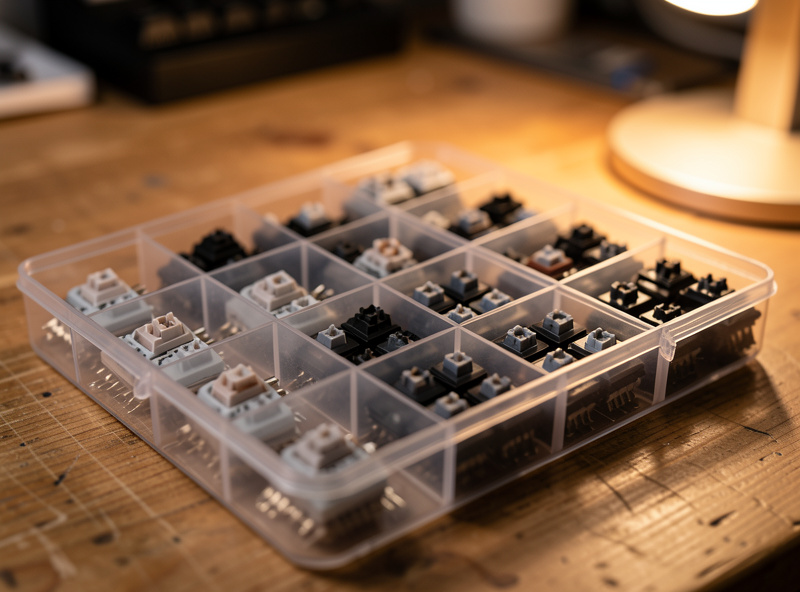
Here is the counterintuitive truth: the switch sets the character of the sound but contributes far less to the overall result than people assume. A linear switch gives you a single clean bottom-out with no tactile bump noise. A tactile adds a leaf-and-bump component, and a clicky bolts a deliberate click mechanism on top. That is real and audible — I cover the three families honestly in my linear vs tactile vs clicky switch guide — but it is the seasoning, not the meal.
Where switches matter most for sound is in two specifics. First, stem length: long-pole switches bottom out harder and earlier, which shifts the pitch up and louder — I dig into that trade-off in my long-pole switches breakdown. Second, lubing and filming: a stock switch with stem wobble and a little scratch sounds rougher and pingier than the same switch tuned. On my lube station I keep both versions of the same switch precisely so I can record that delta — the switch lubing and filming guide is the highest-leverage thing you can do to clean up switch sound, and films in particular tighten the housing rattle that muddies a bottom-out. If you want genuinely quiet, that is a different path entirely, and I laid it out in linear switches for a quiet keyboard and the honest version of silent switches and their trade-offs.
The Case and Plate: Where Most of the Sound Lives
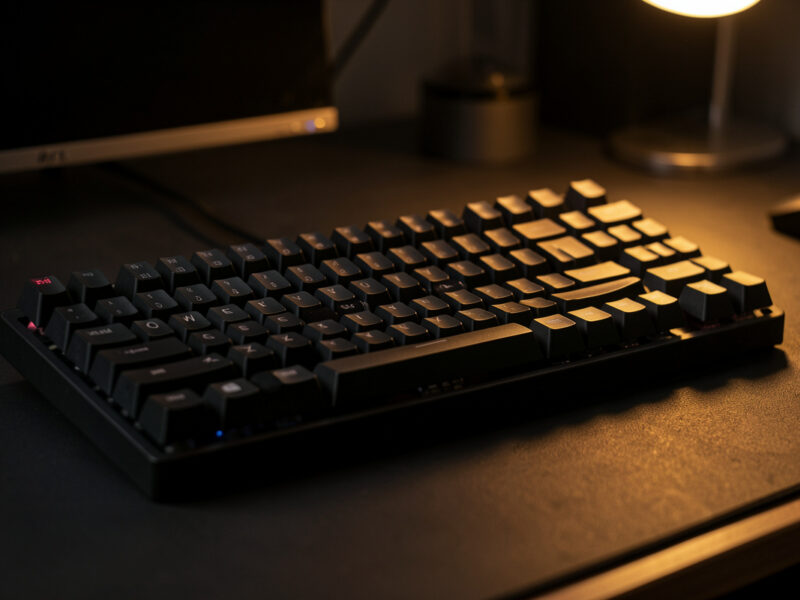
If you only remember one thing from this guide, remember this: the case is the instrument. A keyboard is a box, and a box resonates. An empty aluminum case rings; a plastic case thunks; a poly-filled case dampens. The self-soldered aluminum 65% on my desk and the stock budget 60% I keep as a permanent “before” run can run the exact same switches and keycaps and still sound like two different instruments, and the case is most of that gap.
The plate sits between the switches and the PCB, and the material it is made of changes both feel and sound. A brass plate is stiff and tends to ring brighter and louder; FR4 (the same fiberglass the PCB is made of) is softer and rounder; polycarbonate is softer still and famously deep; aluminum sits in the middle and is the most common default. None of these is “best” — they are flavors, and I compared them under controlled recording in my plate material and keyboard sound comparison. The plate is also the cheapest way to meaningfully re-flavor a board you already own, if it is a hotswap you can open without desoldering.
Foam and Fillers: Dampening Versus Deadening
Foam is the most misunderstood layer in the whole stack. People dump foam into a board expecting “thock” and end up with a flat, dead, muffled keyboard — because foam does not create a sound, it removes resonance. Case foam under the PCB kills the hollow ring of an empty case. Plate foam between plate and PCB tightens and deepens by absorbing the higher frequencies. PE foam over the switch pins (the “PE foam mod”) is the one that actually produces that poppy, marbly character people chase.
The trap is over-stuffing. Too much foam and you have deadened the board — quiet, but lifeless. I walk through where each layer goes and what it changes in my foam layers and keyboard sound guide, and the cheapest entry point is the PE foam mod and the tape mod, both covered in the cheap keyboard mods guide. The honest order of operations: dampen the case ring first, then add character second, and stop the moment it sounds full instead of empty.
Mounting Style: Gasket, Tray, and Top Mount
How the plate-and-PCB assembly is held inside the case changes both the typing feel and the sound signature. Tray mount screws the PCB straight to standoffs in the bottom case — it is the cheapest and most common, and tends to be firmer and sometimes pingier near the screw points. Top mount sandwiches the plate between the top and bottom case for a stiffer, more uniform feel. Gasket mount suspends the plate on strips of soft gasket material so it floats — softer typing feel, and usually a deeper, more cushioned sound.
Silicone is one of the gasket materials you will see most, and it has its own signature that I broke down separately in silicone gasket mount sound explained. The thing nobody tells beginners: mounting style is baked into the board you buy and is the hardest thing to change after the fact. If a specific sound signature matters to you, choose it at purchase, not as a mod. This is also a big part of why custom boards feel better than the prebuilt you started on.
Keycaps and Profile: PBT, ABS, and Thickness
Keycaps are the last surface the sound passes through, and they matter more than their price suggests. The material is the headline: PBT is denser and textured, and tends to read as a slightly deeper, more muted clack; ABS is smoother and harder, and tends to ring a touch brighter and higher. Thickness matters too — thicker walls generally produce a fuller, lower note. I put the material question to a long daily-use test in my PBT vs ABS keycap comparison, and the broader profile question in the complete keycap guide.
Profile — the height and shape of the keycap — changes the angle and force of your strikes, which shifts the sound subtly. Tall sculpted profiles like SA tend to sound deeper and louder; flat profiles like DSA sound tighter. It is a smaller effect than case or foam, but it is real, and it is the one layer you swap purely on preference because you are looking at it all day anyway.
The Tuning Order I Actually Use for Sound
If your goal is a better-sounding board without throwing money at it, the order matters more than the parts list. The single highest-ROI fix in this hobby is not a switch or a case — it is the stabilizers. A rattly spacebar or a ticking shift key will wreck the sound of an otherwise gorgeous board, and tuning them costs nothing but time. I keep coming back to the stabilizer tuning guide and the spacebar rattle fix because they fix the loudest, ugliest sound in most builds for $0.
After stabilizers, the order I would follow: kill any spring ping with a spring swap or lube, dampen the case ring with foam or tape, then add character (PE foam, plate swap, keycaps) last. Switches and a full board come dead last because they cost the most per decibel of improvement. Typing technique matters too, in a way few people discuss — how hard and fast you type changes the sound you actually live with, which I unpacked in typing speed and sound perception. If you are still on your first board, the first custom keyboard guide and the switch types guide are the place to start before you spend on tuning.
Sound Factors Ranked by Impact, Cost, and Effort
Here is how the layers stack up when you weigh how much they change the sound against what they cost you in money and time. This is my working order on the bench — start at the top.
| Factor | Sound Impact | Cost | Effort | When to Reach For It |
|---|---|---|---|---|
| Stabilizer tuning | High (removes worst noise) | Free–low | Medium | Always first |
| Case material / fill | Very high | Built into board | Buy decision | At purchase |
| Foam (case + PE) | High | Low | Low–medium | After stabs |
| Mounting style | High | Built into board | Buy decision | At purchase |
| Plate material | Medium–high | Low–medium | Medium | Hotswap re-flavor |
| Switch tuning (lube/film) | Medium | Low | High (time) | For refinement |
| Keycap material | Medium | Medium | Low | Preference swap |
| Switch choice | Low–medium (character) | Medium–high | Low | Sets the flavor |
How I Test Keyboard Sound (And Why It Matters)
Every sound claim on this site comes from the same setup: one microphone, one fixed distance, one desk, stated every time. I record the board, change exactly one variable, and record again without moving anything. That is the only way to isolate what a single layer actually does, and it is the discipline the genre badly lacks.
Why does this matter to you as a buyer? Because the sound test you watched before buying almost certainly was not controlled. Different room, different mic, different gain, often a different keycap set than the one named. When you understand that the case dominates and that foam removes rather than adds, you can listen to those clips with the right skepticism and stop buying switches to fix problems that live in the case. Treat your own ears and a consistent recording as the source of truth, and treat marketing words like “thock” as the loose, ironic shorthand they are.
The Sound Mistakes That Cost People the Most
Most disappointing-sounding builds come from the same handful of mistakes, and none of them are about spending more money. The first is over-foaming: cramming every cavity full and ending up with a dead, muffled board that has no life left in it. Foam is a scalpel, not a filler. The second is chasing the sound in the switch when it lives in the case — buying a fourth set of switches to fix a hollow ring that a $3 sheet of foam would solve.
The third, and the most common, is ignoring the stabilizers entirely. A board can have a perfect case, perfect foam, and a gorgeous switch, and one rattling stabilizer will be the only thing your ears hear. The fourth is trusting uncontrolled sound tests — buying the exact keycaps and switches from a clip recorded in someone else’s room and being baffled when your board sounds nothing like it. And the fifth is mismatching keycaps to intent: bolting thin, bright ABS onto a board you wanted to sound deep, then blaming the switches. Fix the order — stabilizers, case ring, then character — and most of these never happen.
Matching the Sound to Where You Actually Type
The right sound profile depends as much on your room as your taste. If you type in a shared office or a household with thin walls, chase a quiet, dampened build: linear switches, generous case foam, soft keycaps, and well-tuned stabilizers so nothing pings. The path to genuinely quiet is its own project — I laid it out in linear switches for a quiet keyboard and the trade-offs of silent switches — and it leans on dampening every layer rather than chasing a satisfying clack.
If you type alone in your own space, you have permission to go the other direction entirely: a bright, clacky board with a stiff plate and thin caps can be a joy when nobody else has to live with it. And if you are on calls or recording at your desk, remember the microphone hears your keyboard before your coworkers do — a deep, dampened board is the courteous choice there too. None of this is about the most expensive parts. It is about pointing the whole stack — case, foam, switch, keycap, stabilizers — at one coherent target instead of fighting yourself layer by layer. Decide the sound you want first, then build backward from the case, and the rest of this cluster fills in each step.
Your Desk and Room Are Part of the Sound
The keyboard does not make sound in a vacuum — it makes it on your desk, in your room, into your ears. A thin, hard desk acts as a soundboard and amplifies the bottom-out, especially the lower frequencies that travel through the surface; a thick, solid desk or a deskmat absorbs some of that and tightens the sound. A deskmat is the cheapest “mod” in the entire hobby because it costs nothing acoustically beyond what you already wanted for your mouse, and it genuinely deepens and quiets a board by decoupling it from the desk. I walked through that free upgrade in the desk mat and keyboard sound guide.
The room matters too. A small, hard-surfaced room with bare walls reflects sound and makes any board brighter and louder; a carpeted room with soft furnishings absorbs reflections and calms the same board down. This is a big reason a keyboard you loved in a sound test sounds different at your own desk — you changed the room. It is also why I insist on recording every comparison in the same spot: the moment the room changes, the sound changes, and the component you were trying to evaluate gets lost in the variables. When you judge your own board, judge it where you actually use it, on the surface you actually type on, and stop chasing a sound that only existed in someone else’s room.
One last structural point that shapes how much of this you can actually use: whether your board is hotswap or soldered decides how freely you can experiment with sound at all. On a hotswap board you can open it, swap a plate, add foam, change switches, and close it back up in an afternoon, so every lever in this guide is available to you cheaply. On a soldered board the switches hold everything captive, so plate and switch changes become a desoldering project and most of your tuning has to happen at the case-foam and stabilizer level. If sound experimentation appeals to you, that is a strong argument for starting hotswap, as I argue in the barebones vs prebuilt comparison and the first custom keyboard guide. The freedom to iterate is itself part of why the hobby is fun.
Frequently Asked Questions
What makes the biggest difference to keyboard sound?
The case is the single biggest factor. An empty aluminum case rings, a plastic case thunks, and a foam-filled case dampens, all with the same switches. The case and how the board is mounted dominate the sound far more than which switch you choose.
Do switches really change a keyboard’s sound that much?
Switches set the character but contribute less than people assume. They decide whether you hear a tactile bump or a clean linear bottom-out, but the depth and pitch of that sound are mostly the case, plate, and foam. Tuning switches with lube and film refines the sound more than swapping brands.
How do I make my keyboard sound deeper and thocky?
Dampen the hollow case ring with foam, choose a softer plate like FR4 or polycarbonate, add PE foam over the switch pins, and tune your stabilizers so nothing rattles. Deep sound comes from removing resonance and high frequencies, not from one expensive switch.
Does foam make a keyboard sound better?
Foam removes resonance rather than creating sound. Case foam kills the hollow ring and PE foam adds a poppy character, but too much foam deadens the board into a flat, lifeless thud. The goal is to dampen the empty ring and stop the moment it sounds full instead of hollow.
Why does my expensive keyboard sound bad?
Almost always untuned stabilizers. A rattling spacebar or ticking shift key wrecks the sound of an otherwise great board, and it costs nothing but time to fix. Tune the stabilizers first, then address spring ping and case ring before blaming the switches or the case.
Can you trust online keyboard sound tests?
Only with heavy skepticism. Most sound tests use different rooms, mics, and gain settings, so two clips are rarely comparable. Trust controlled comparisons where one variable changes at a time, and treat uncontrolled phone-mic clips as rough impressions, not evidence.